
How to locate elements in Playwright

In order to write end to end tests we need to first find elements on the webpage and then perform user actions on them. For example, find a link and click on it.
The most convenient way to find an element is to use Playwright's test generator, which allows you to not only generate tests but also generate a locator for a specific element.
But before we dive into how to use the test generator, first let's understand what a link element is and what exactly locators are.
What is a link?
The HTML <a> element, also known as the anchor element, is an interactive element that creates a hyperlink to another page either within your site or externally to another site. It can also be used to link to specific areas on the same page as well as for emails, file downloads or anything else a URL can address. The <a> element uses the href attribute to pass in the URL that the hyperlink points to.
So how can we locate a link element so we can click it? We use Locators.
What are locators?
In Playwright we use a term called Locators. Locators represent a way to find elements on the page complete with auto waiting and retry-ability. Auto waiting means that Playwright performs a range of actionability checks on the elements, such as ensuring the element is visible and enabled before it performs the click.
You can locate elements by:
How to locate a link
The HTML <a> element comes with the implicitly defined role of link, so we don't need to modify the HTML in order to get this role.
<a href="/about">About</a>
That means we can locate an <a> element by using the getByRole() locator, with the role of link and add the click method to the end of it.
await page.getByRole('link').click();
Adding a name
This will work but of course what if you have more than one link on the page? That's where the name option comes in. This is the accessible name for the link used by Assistive Technologies to identify the element. The name is normally taken from the elements content, an attribute, or from an associated element.
await page.getByRole('link', { name: 'About' }).click();
Using regex
We can also use a regular expression and ignore the case so that the test will pass regardless of if the text it contains has a capital letter or not.
await page.getByRole('link', { name: /about/i }).click();
Setting exact to true
You can set exact to true for an exact match. This is helpful if, for example, you have a link that contains the text "About" and another one that contains the text "About the Company". With exact set to true it will only match the link with "About" and not with "About the Company".
await page.getByRole('link', { name: 'About', exact: true }).click();
Adding an aria-label
If a link contains an aria-label then the value of the aria label will be used instead of the text content.
<a href="/locators" aria-label="read more about locators">Read more</a>
We can then locate the link using the getByRole() locator of link followed by the value of the aria-label as the name.
await page.getByRole('link', { name: /read more about locators/i }).click();
When you are writing your tests it can be quite difficult to know which accessible role to use if using the getByRole() locator. For a link it is pretty straight forward but there is a vast list of roles that can be used. If your element doesn't have an accessible locator then choosing the best locator to use is not easy especially if you are not familiar with the DOM structure of the site you are testing. So how can you choose the best locator?
Don't spend time trying to figure out which is the best locator to use. Instead use the test generator to generate your locator.
Playwright's test generator
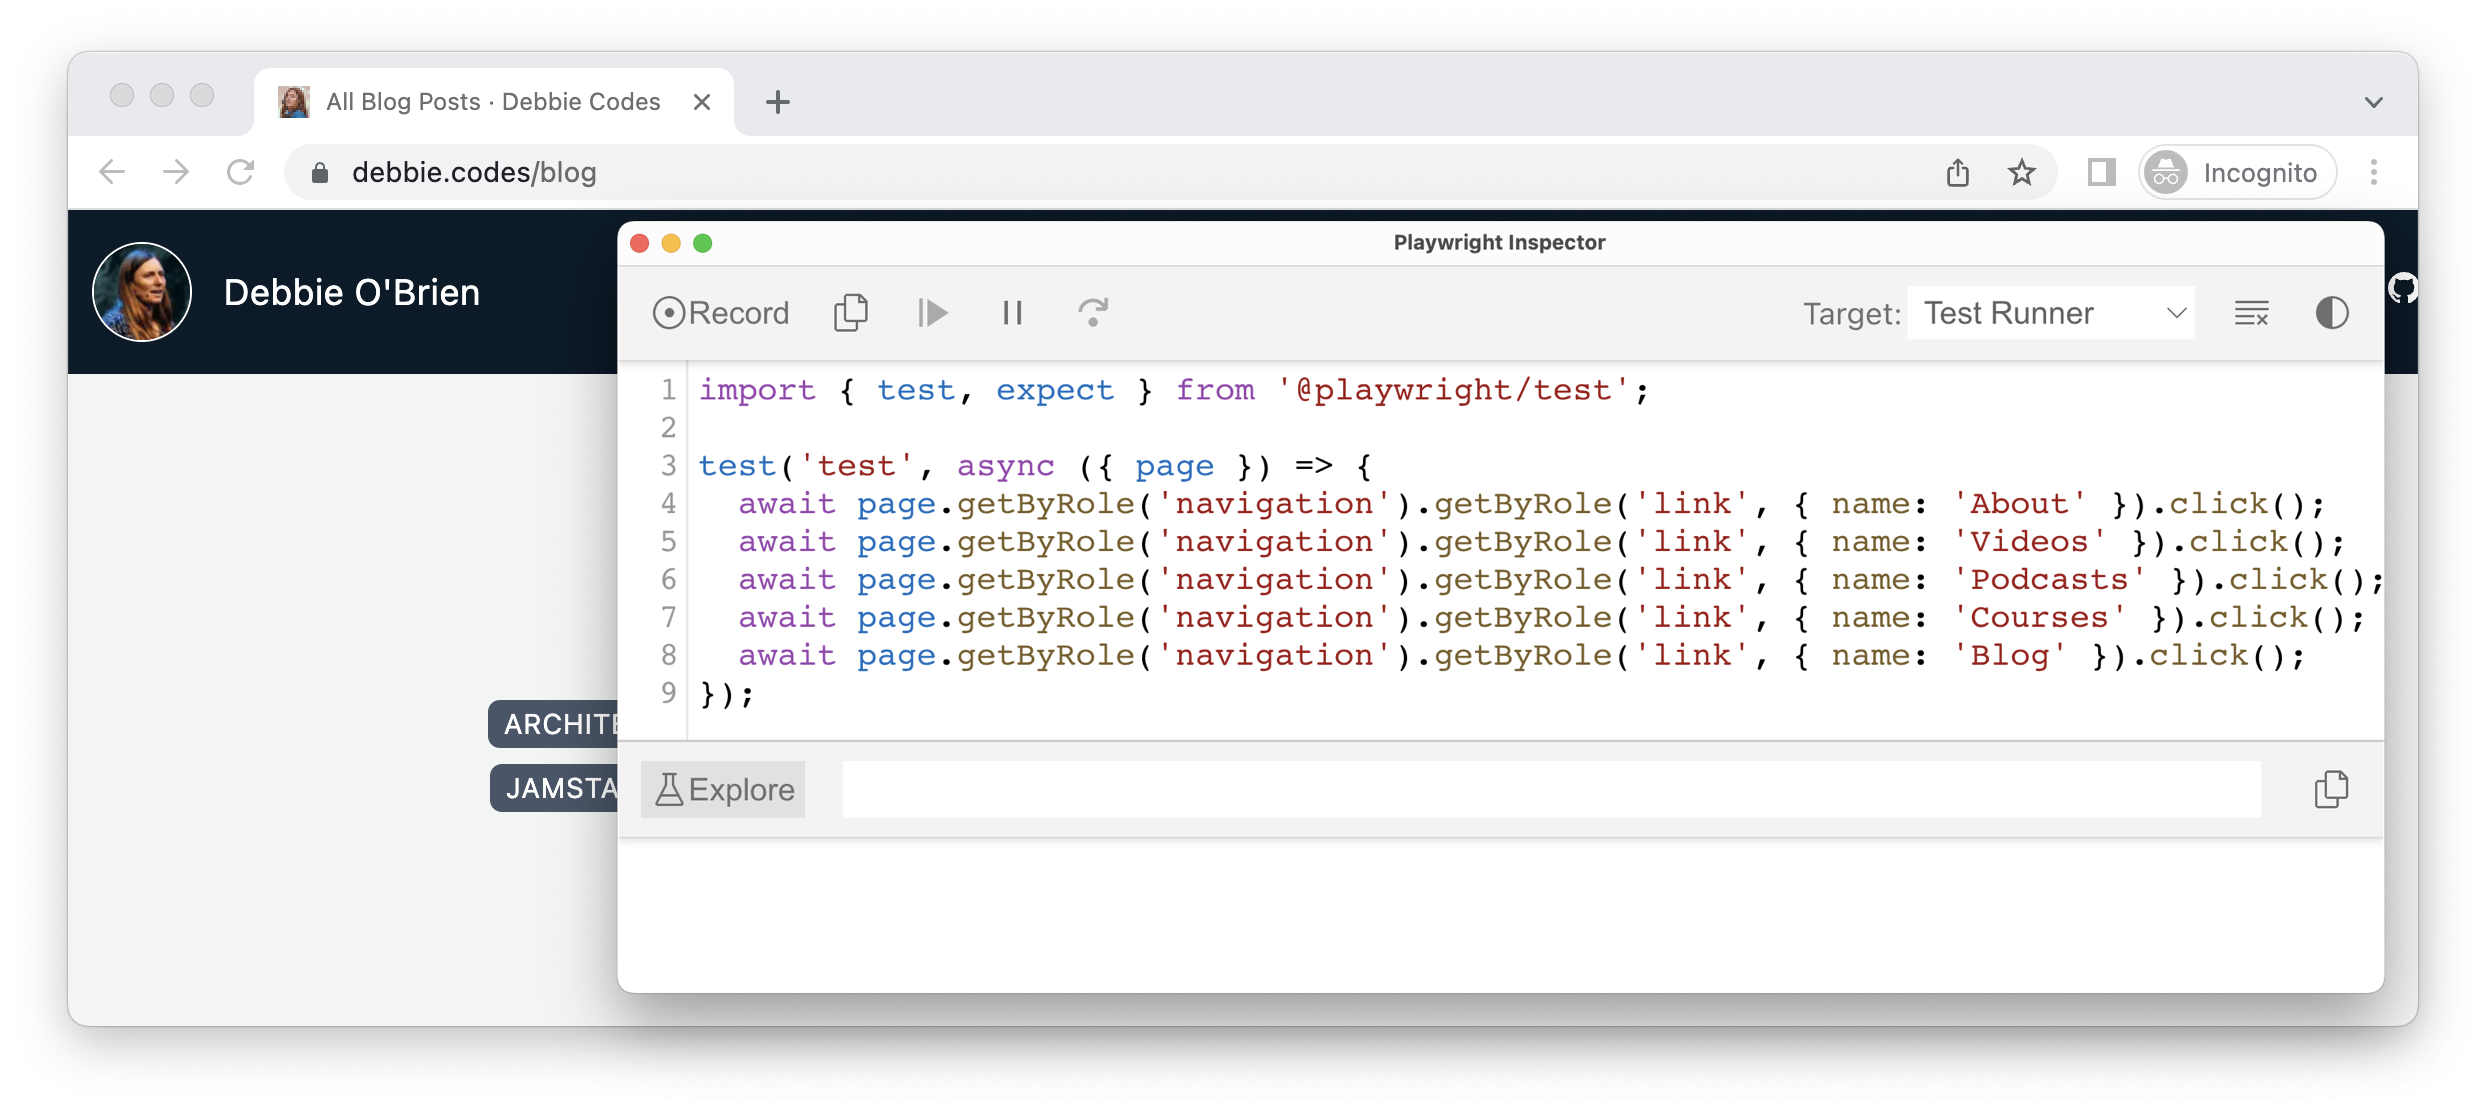
You can generate code right from VS Code when using the VS Code extension by clicking the 'record new' link from the testing sidebar.
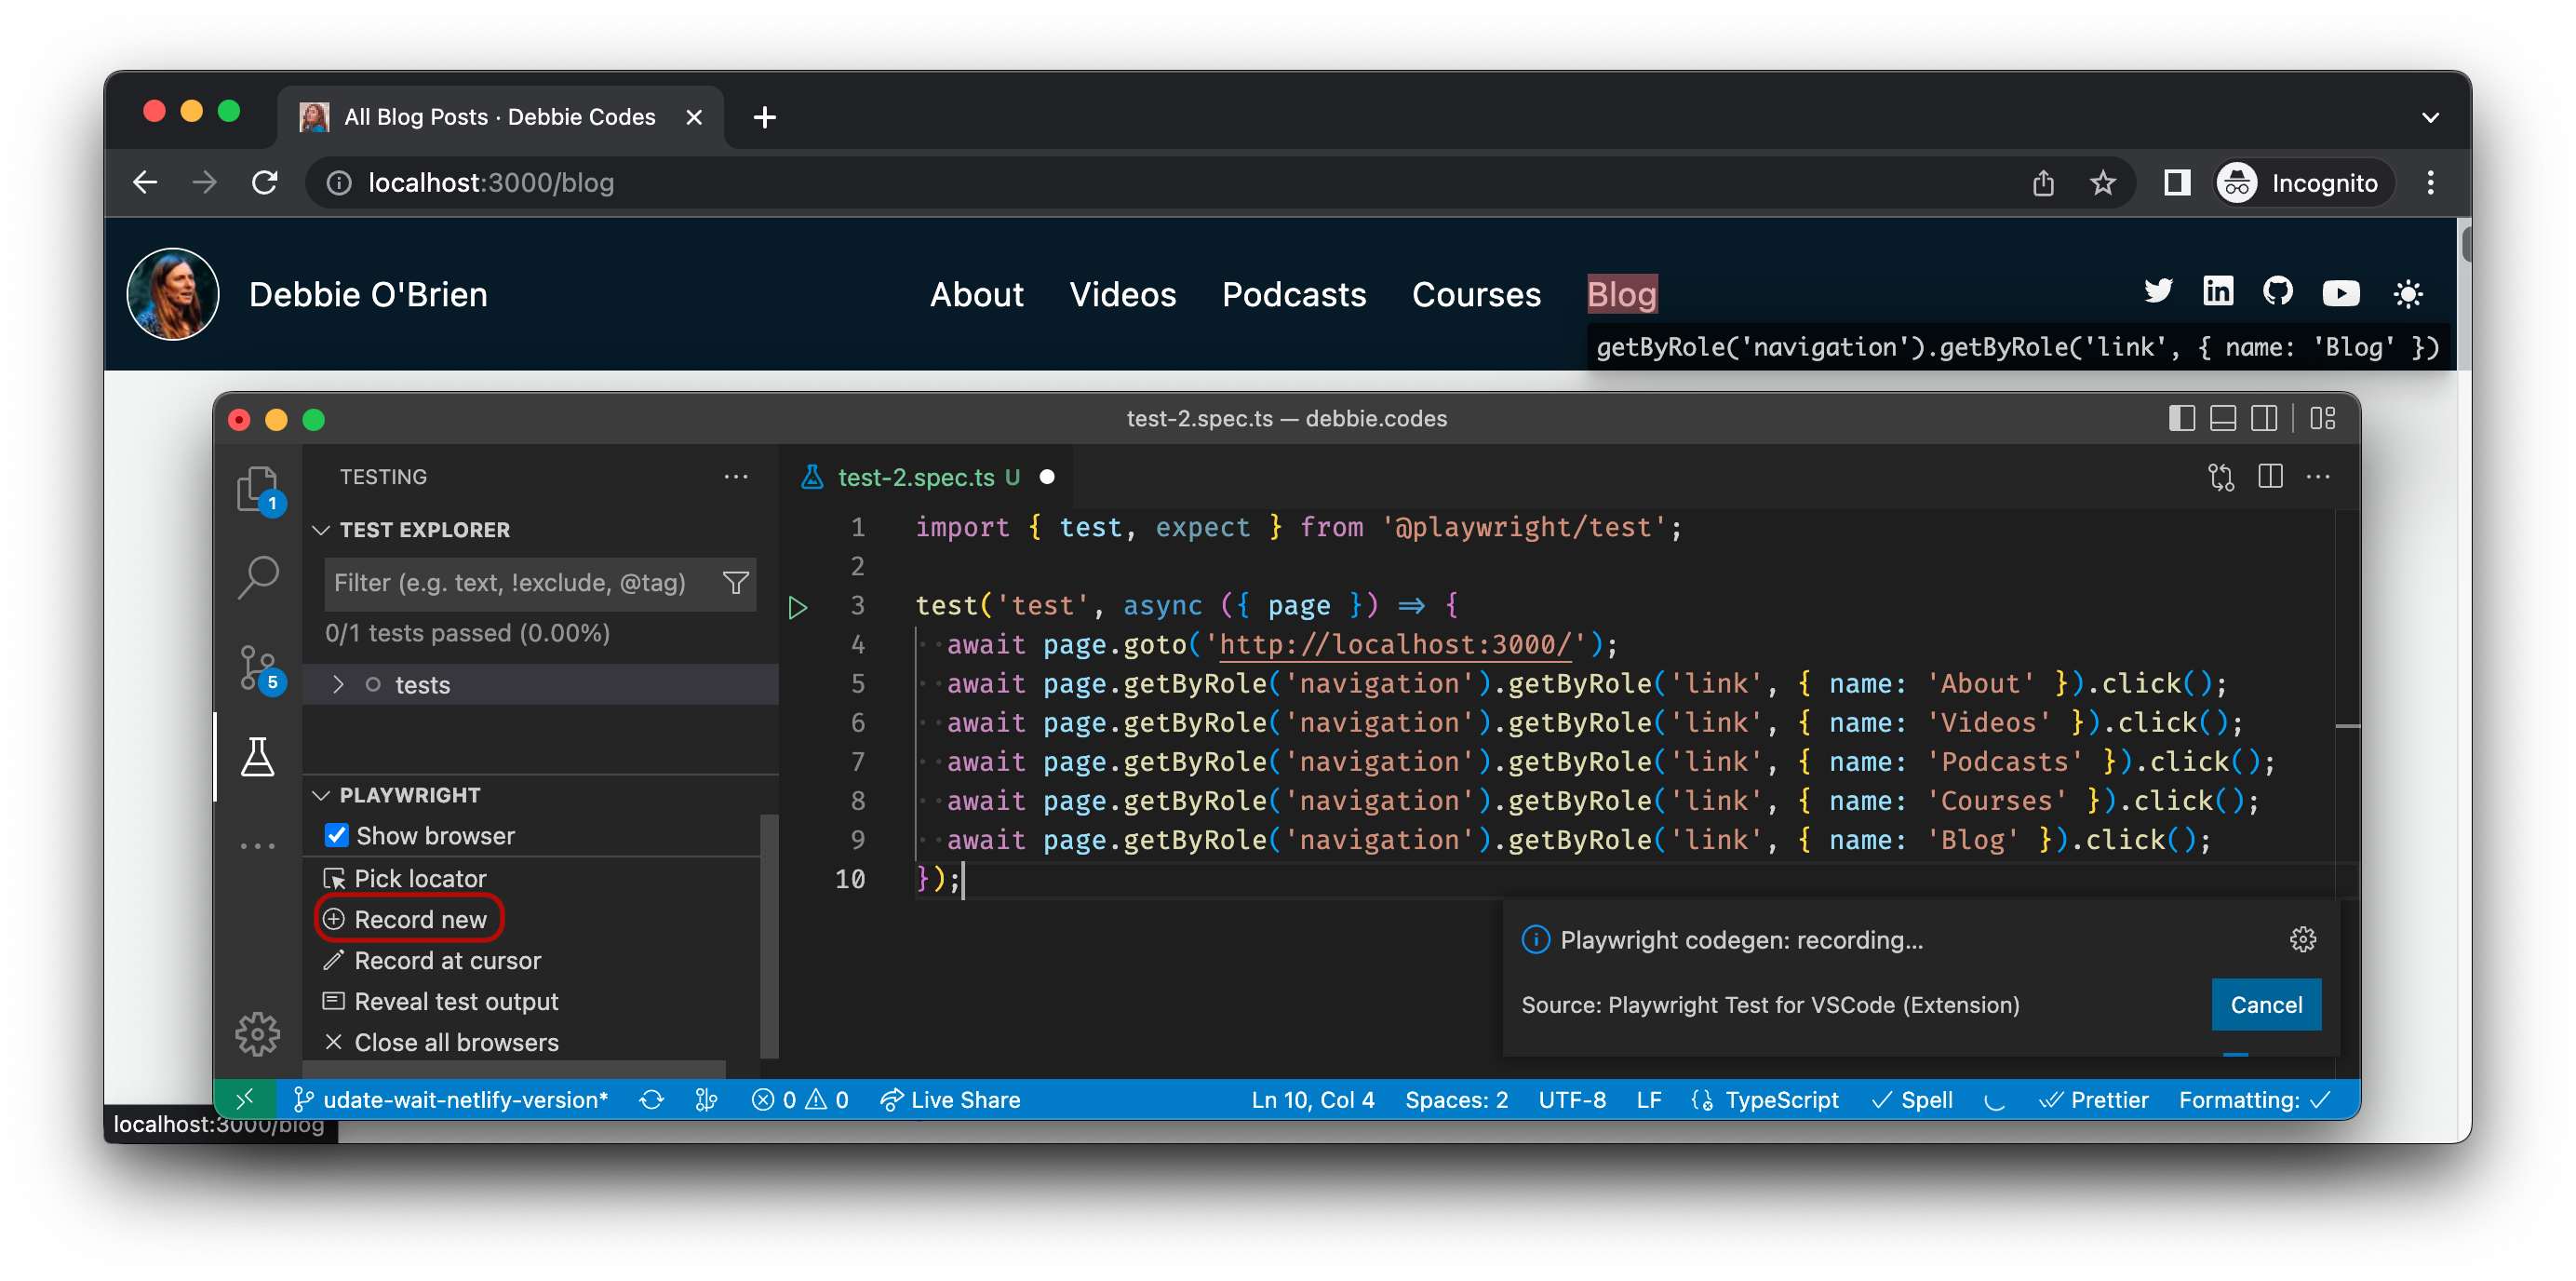
As you click on an element on your website, the generator will look at your page and figure out the best locator for you, prioritizing role, text and test id locators. If the generator finds multiple elements matching the locator, it will improve the locator to make it resilient and uniquely identify the target element, so you don't have to worry about failing tests due to locators. For example, it could chain locators to narrow down the scope, or use the filter() method to select between multiple elements.
If you are not using the VS Code extension, Playwright comes with a standalone test generator called [Codegen](https://playwright.dev/docs/test generator-intro).
npx playwright codegen
Pick a locator
You can pick a locator by clicking the pick locator button from the testing sidebar when using the VS Code Extension.
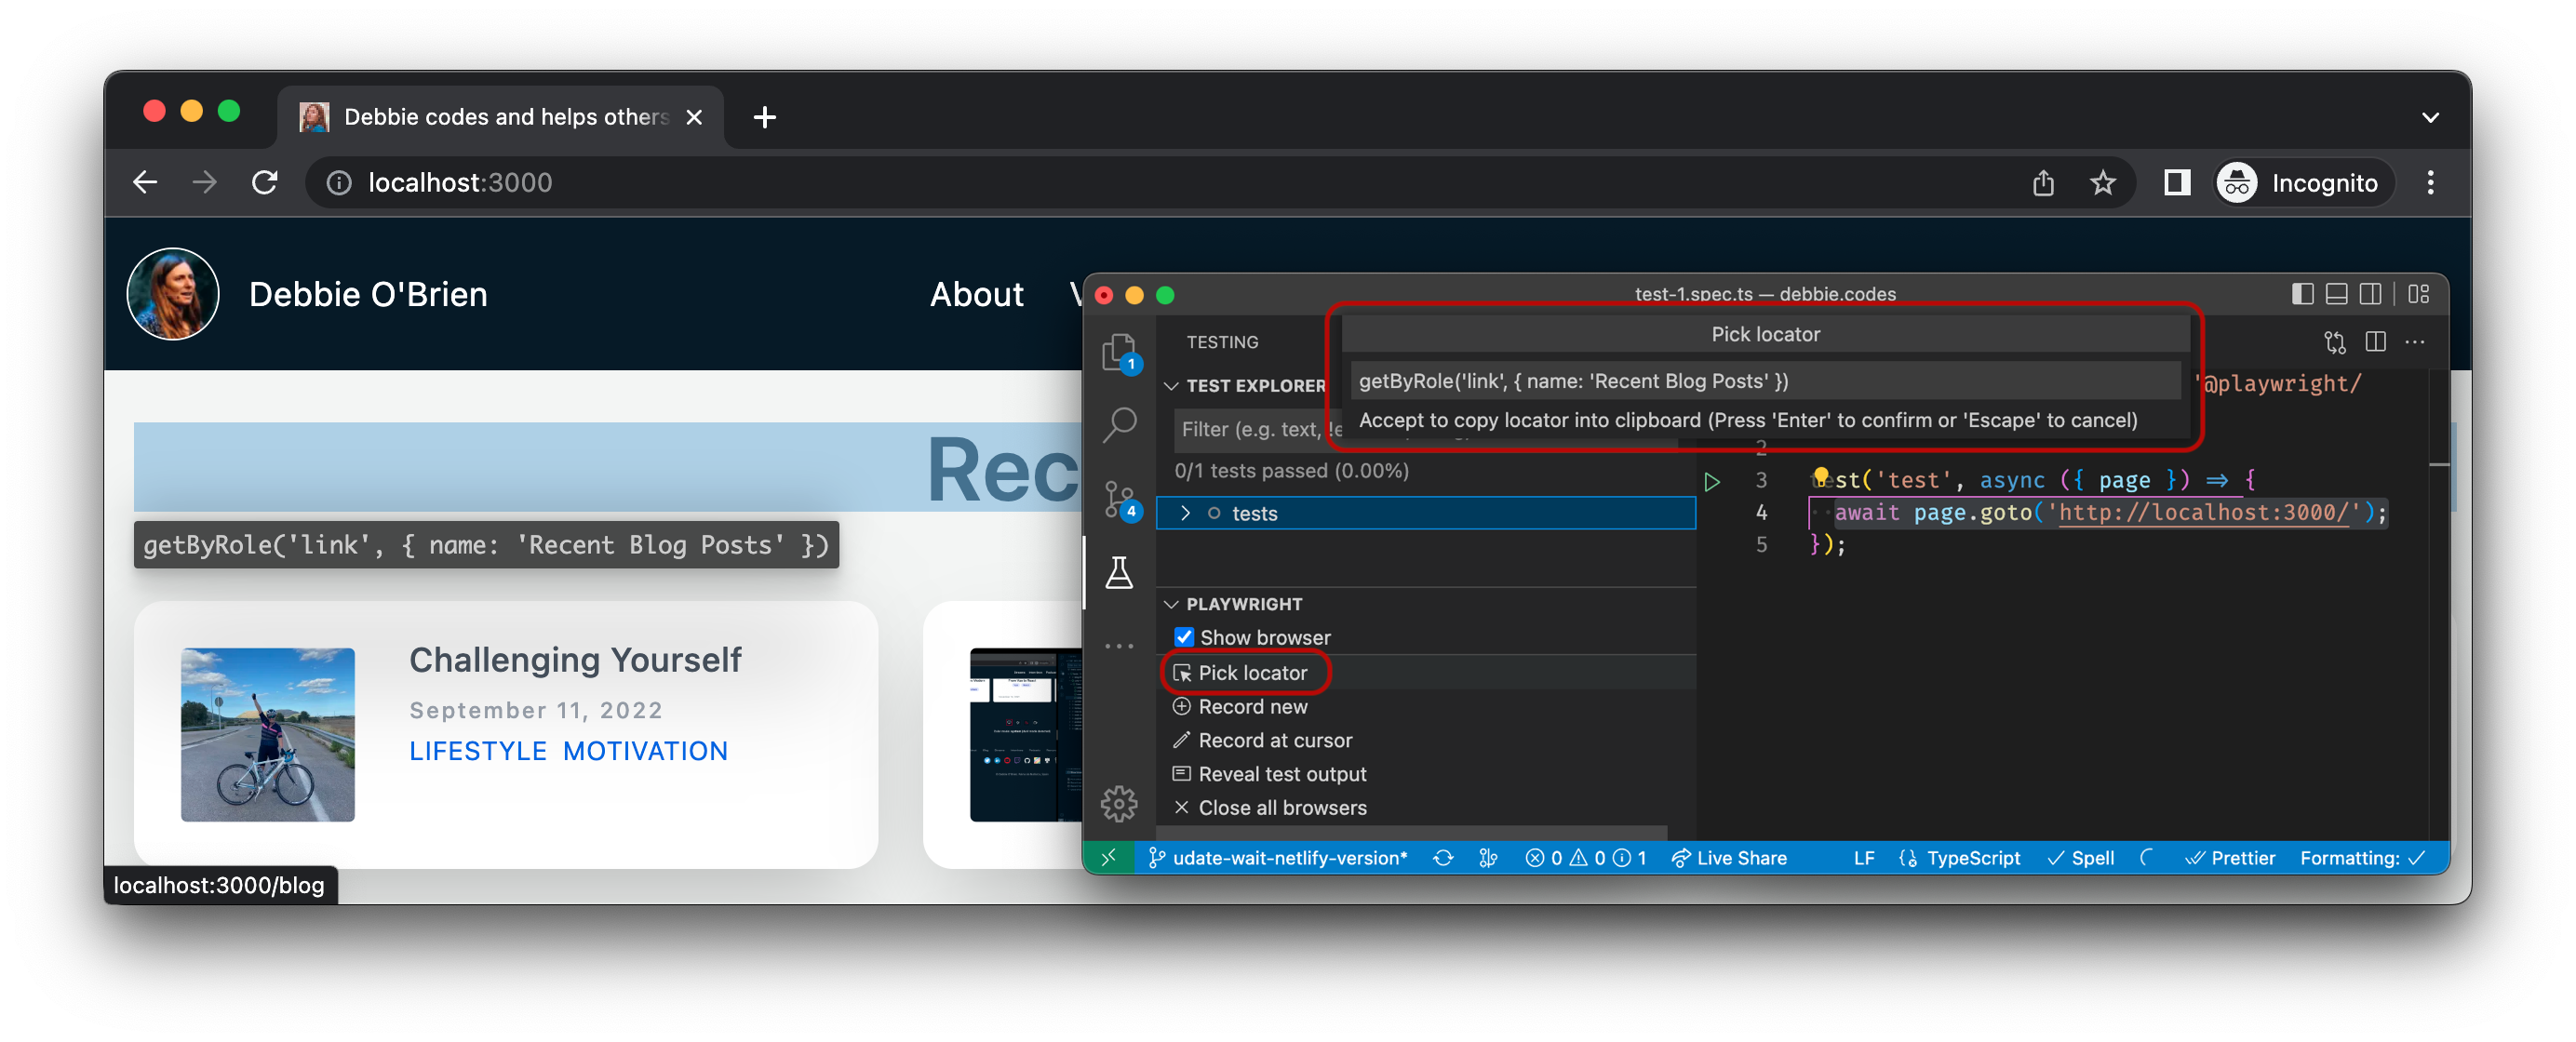
When you hover over any element in the browser window the locator for that element will be highlighted under your cursor. If you click on the element the locator will appear in the 'pick locator' box. You can then copy it to your clipboard and paste it into your test.
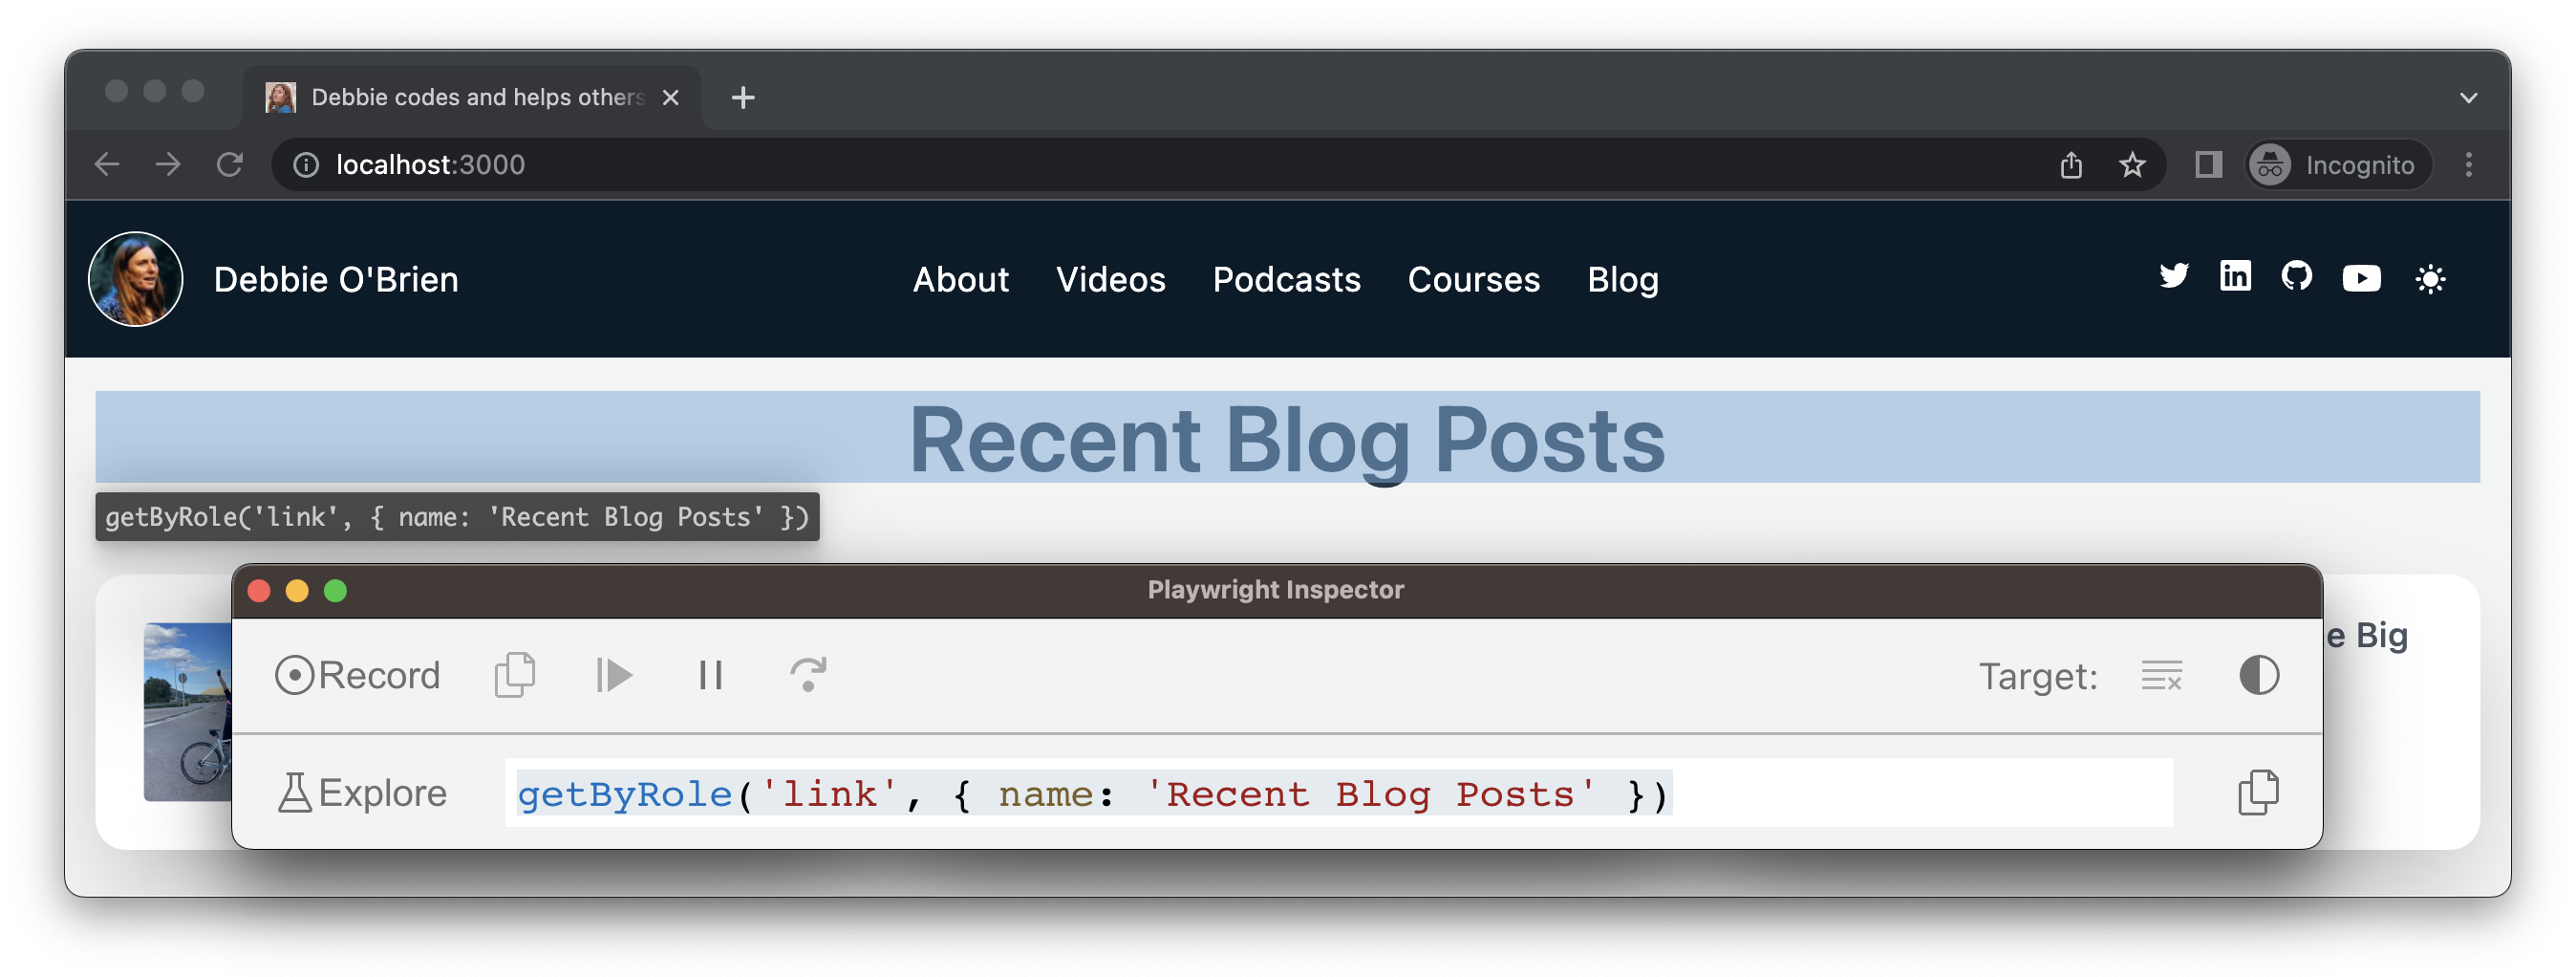
You can also pick a locator when using the standalone test generator by clicking the explore button.
npx playwright open
Chaining locators
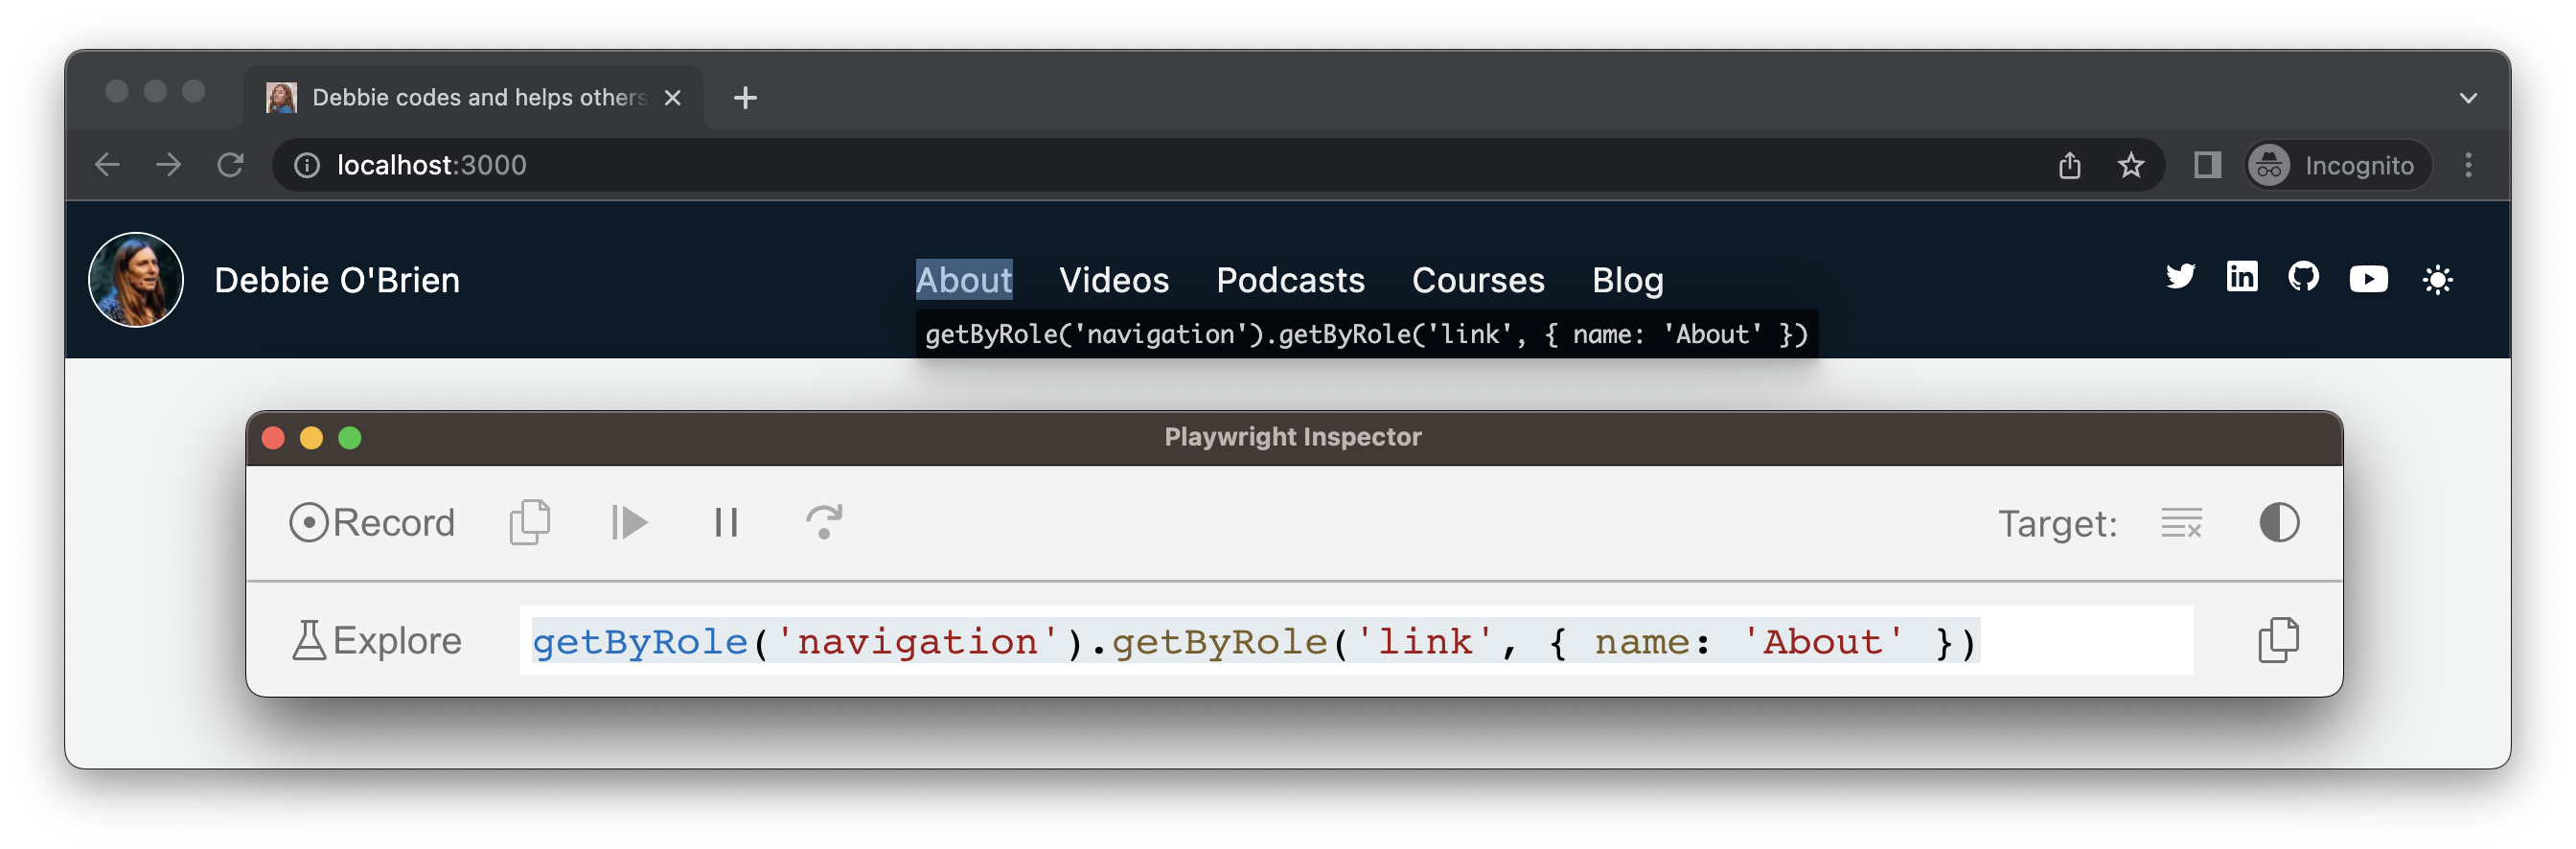
If your site contains duplicate links, for example two about links, one in the header and one in the footer, then the test generator will create a unique locator for each one. It does this by looking for an easily-identifiable ancestor of the link and chains the locators.
getByRole('navigation').getByRole('link', { name: 'About' })
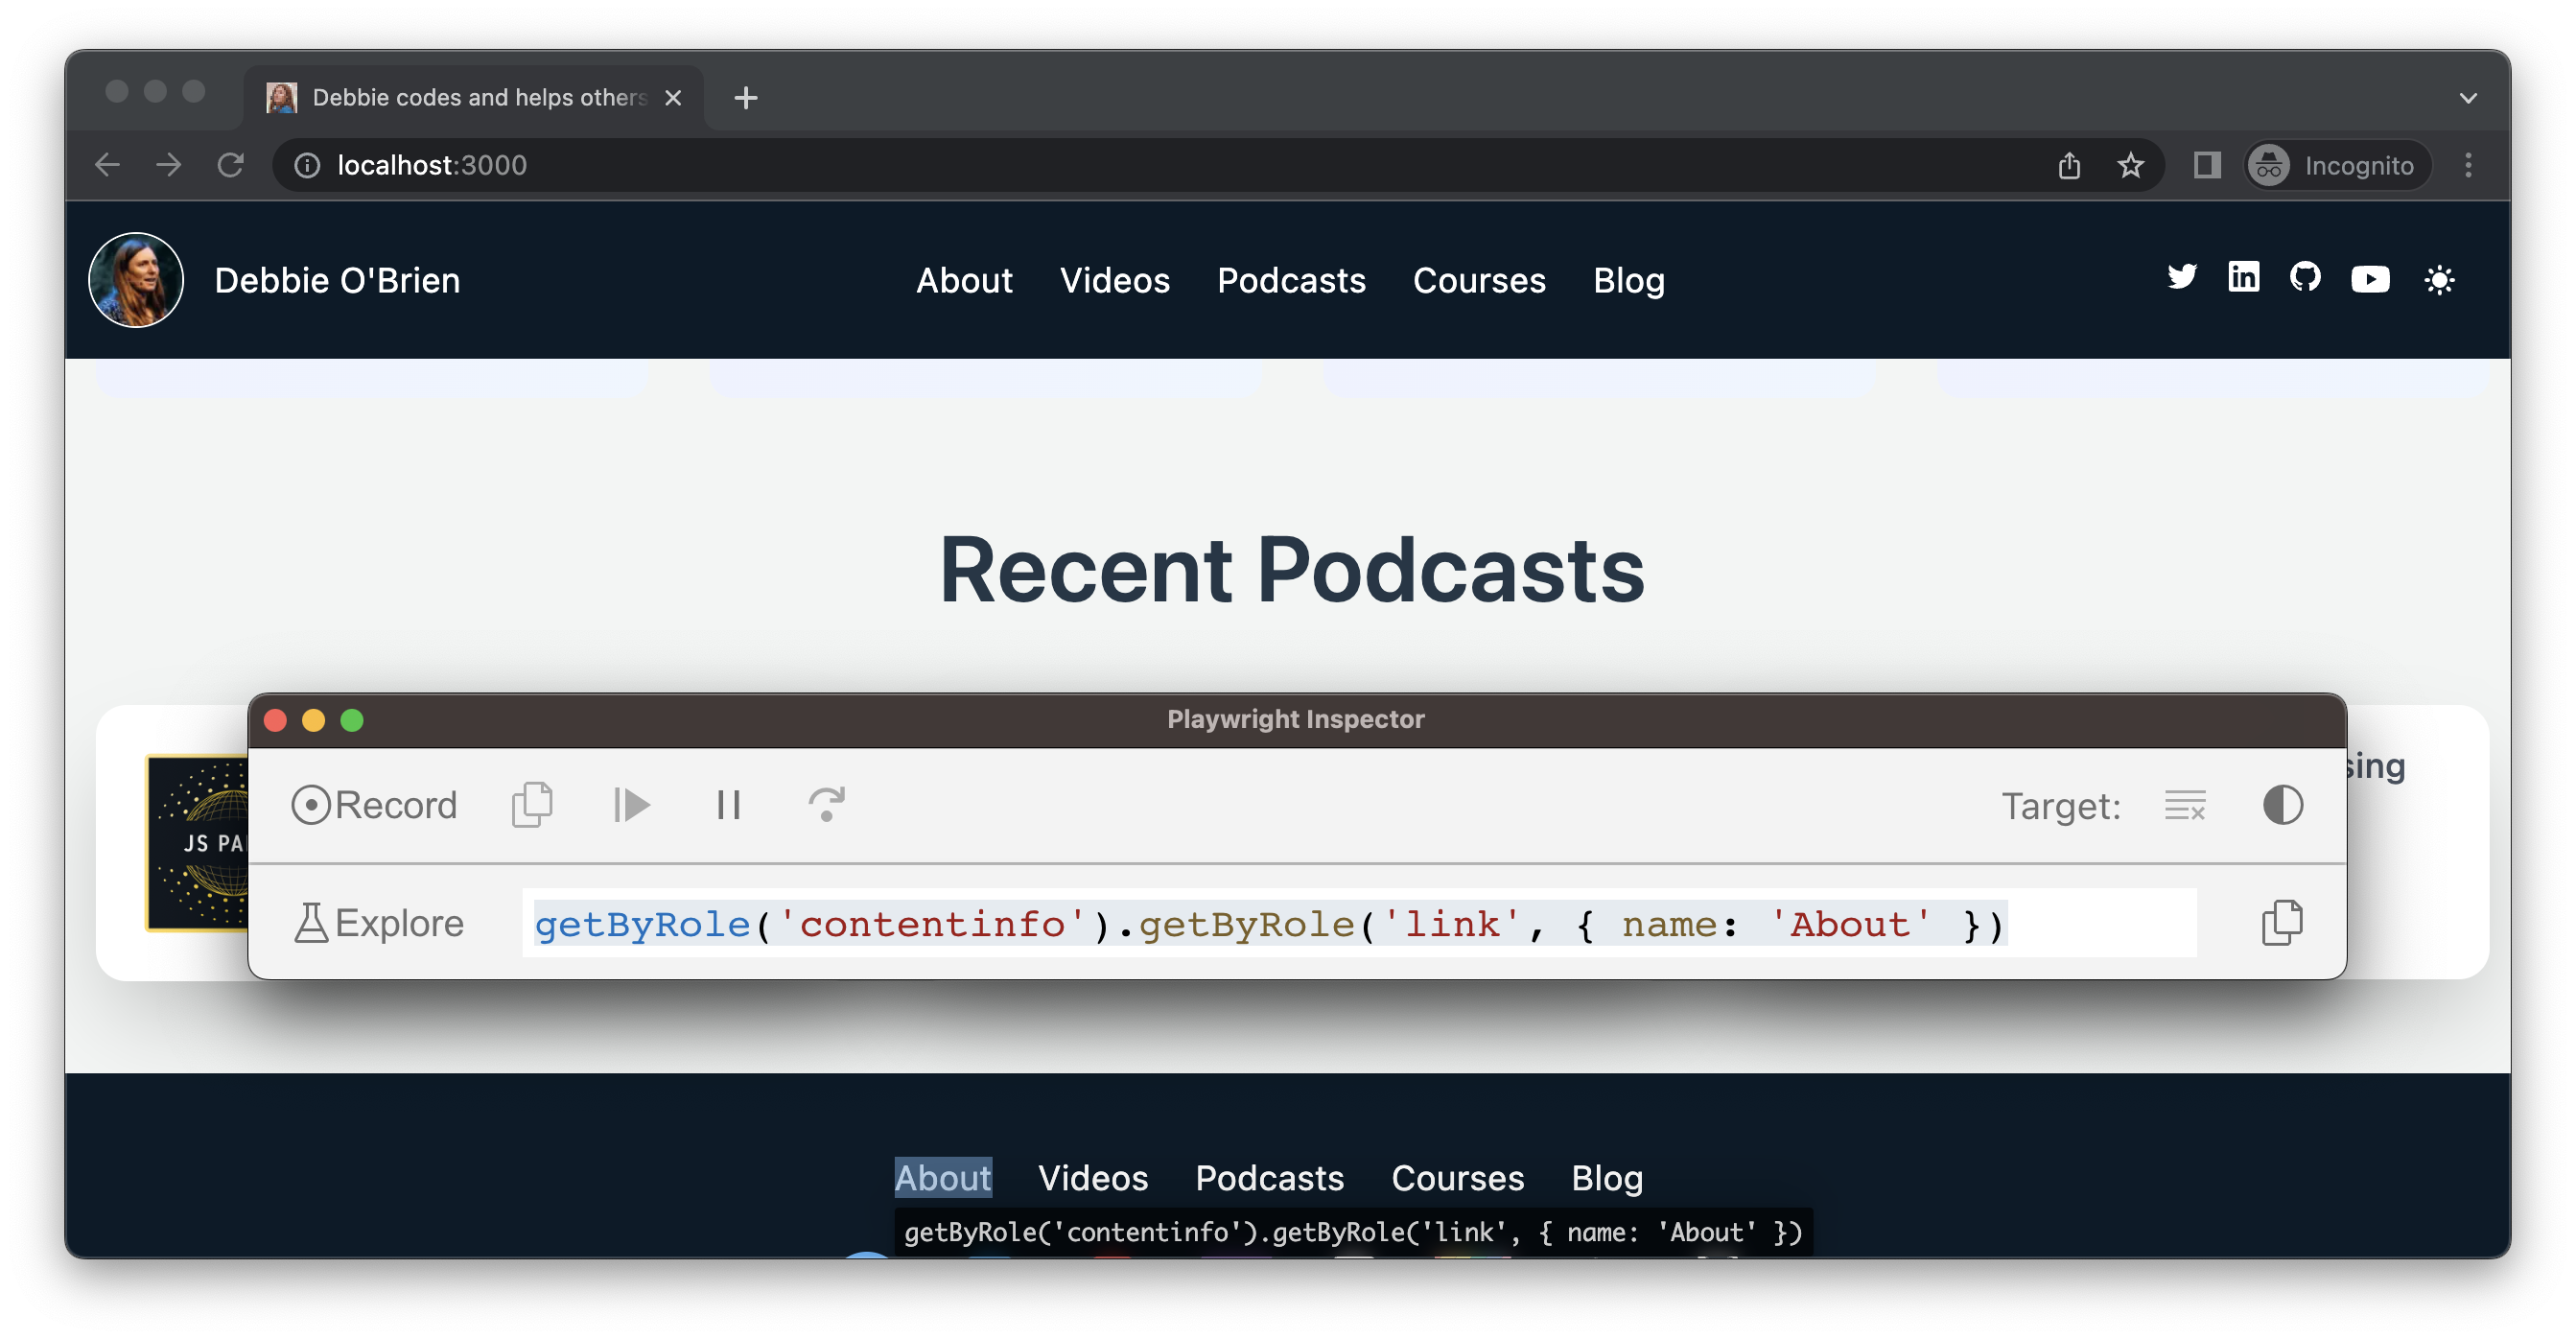
For the about link in the footer the test generator again looks for an ancestor and chains the two getByRole() locators ensuring that there is only one element matching this locator.
getByRole('contentinfo').getByRole('link', { name: 'About' })
Filtering locators
If the test generator can't give you a unique locator through chaining it will use the filter() method to ensure the locator is unique. For example, we might have two lists that contain topics for blog posts. The first list is used to filter the blog posts and the second list is used to display the topics for each post. The test generator will use the filter() method to ensure the locator is unique.
getByRole('list')
  .filter({ hasText: 'architecturedev reljamstackjavascriptpersonalmentoringmotivationnuxtperformance' })
  .getByRole('link', { name: 'architecture' })

Improving your locators
You may notice that filtering by text can sometimes give you a really ugly locator, like in the example above, and may cause you issues later, especially if you add another topic to the filters.
You can improve this filter by using a regular expression to match certain words in the text, choosing ones that would normally not be seen together in a post such as 'architecture', 'mentoring' and 'testing'.
getByRole('list')
  .filter({ hasText: /architecture.*mentoring.*testing/ })
  .getByRole('link', { name: 'architecture' })
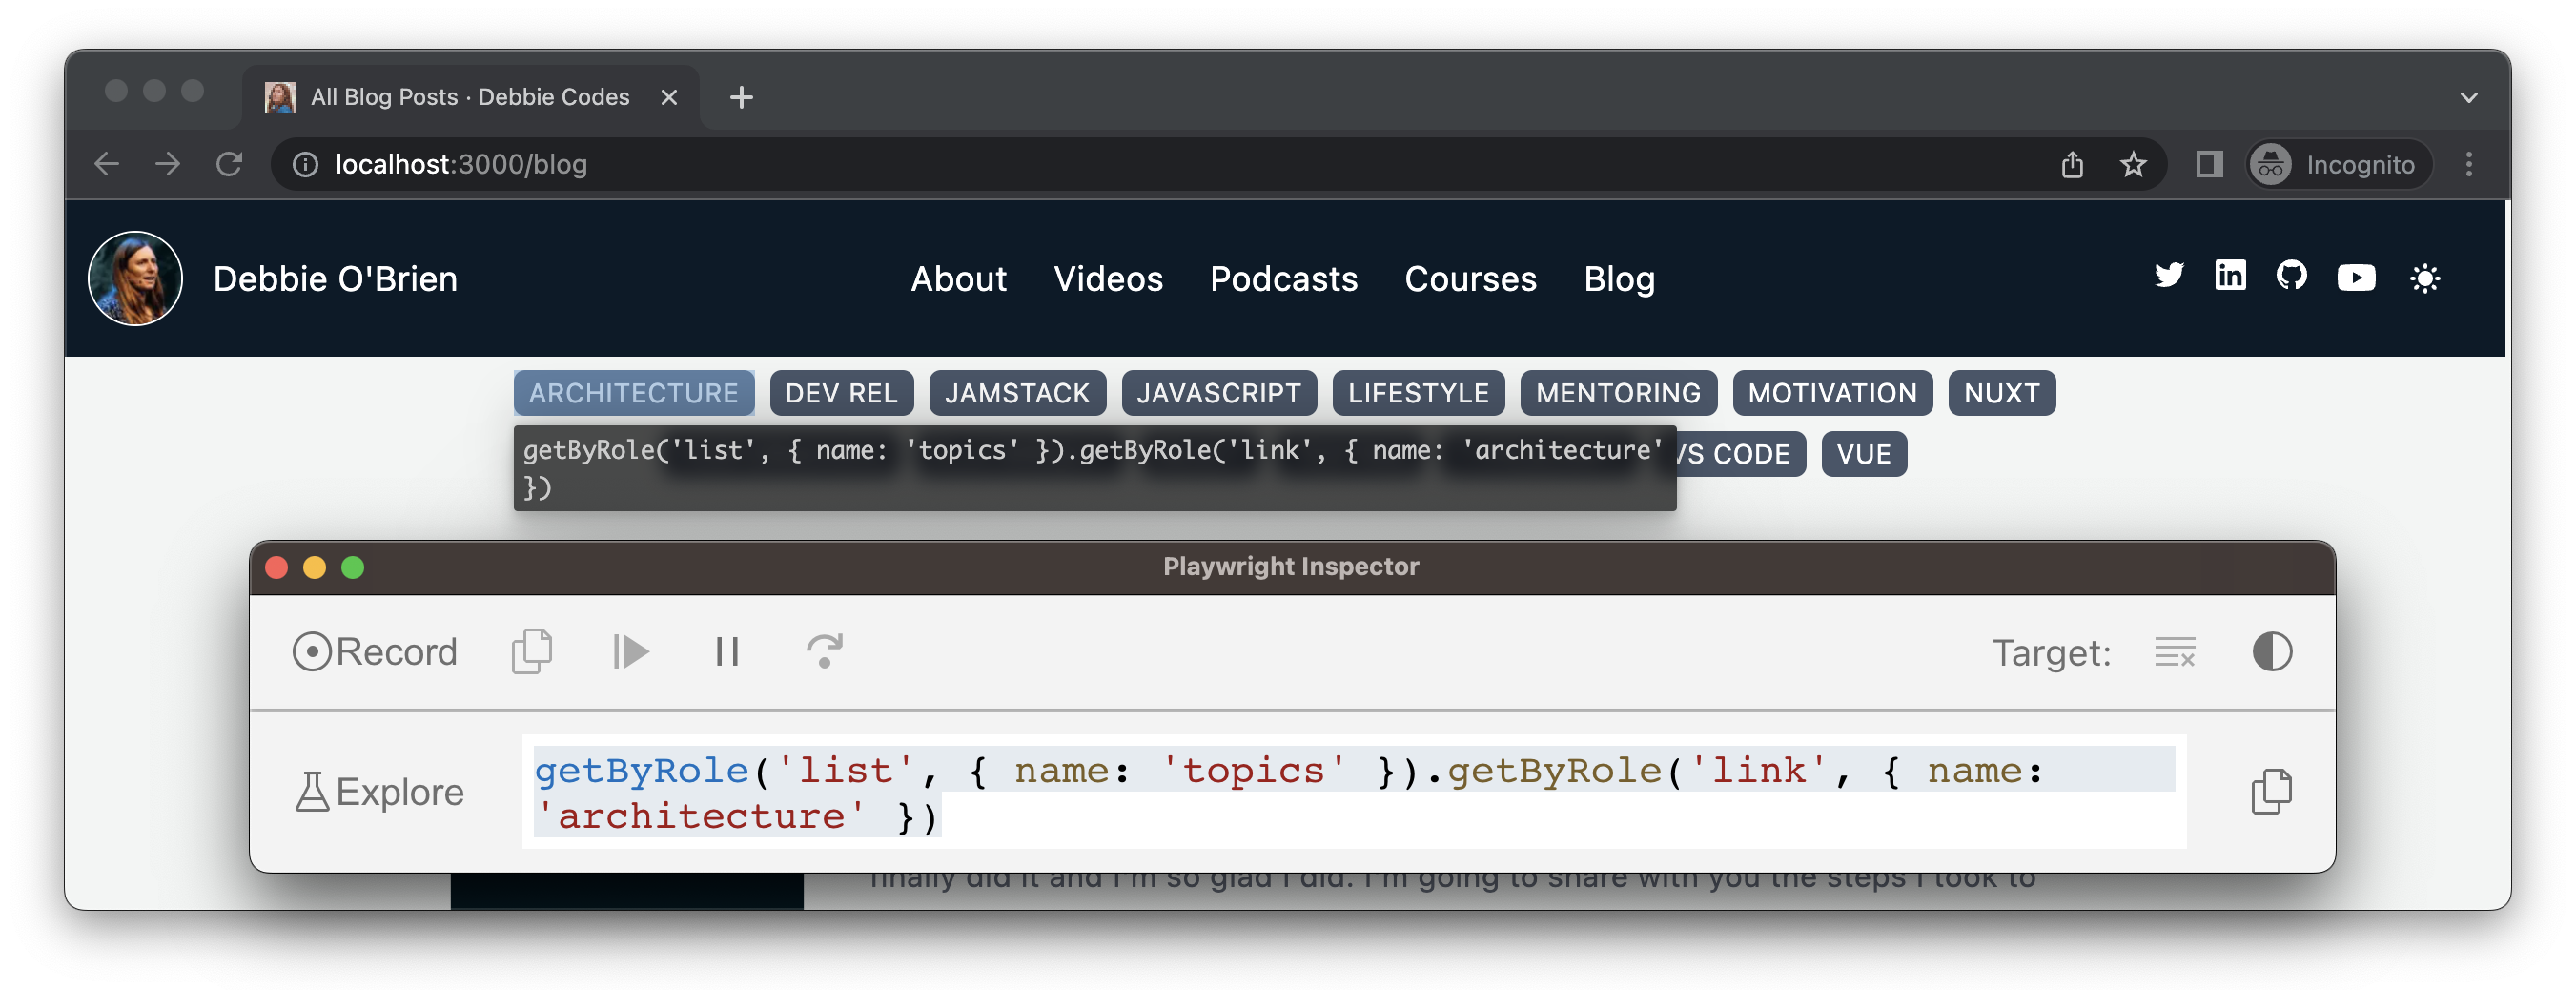
Another option is to add an aria-label to the first <ul> element with the value of topics. This not only helps improve the accessibility of the page but also allows Playwright to locate by role.
<ul aria-label="topics">
  //...
</ul>
The test generator will now use this aria-label and locate by the role of list with the name of topics therefore generating a unique locator.
getByRole('list', { name: 'topics' }).getByRole('link', { name: 'architecture' })
Conclusion
There are many other roles and locators that we didn't touch on in this post. The great thing is that you don't have to know which ones are available to you because thanks to the test generator you don't have to worry about which role or locator to choose when writing your tests. This makes for a much better developer experience and ensures you have resilient locators whether you are new to testing or not.
And of course if the test generator generates a locator that you are not happy with then it might be worth investigating the DOM to see if you can improve your code to be more accessible, and in that way the test generator can generate more accessible locators. This gives you better tests and improved code at the same time.
I encourage you to give the test generator a try either using the VS Code extension or opening it from the terminal with npx playwright codegen. Happy testing.