
Deploying your Nuxt app to Netlify

When starting out in development we need to learn so many things. A new language, a new framework and new concepts. Once we have understood most of this and have some cool demo or app that we have created we just want to show it to the world or see what it would be like if it was deployed.
Where do we start
Before it was complicated. I used to have my own hosting account and I battled many times with hosting issues and accounts and really it was not fun at all. But nowadays we have so many options and not only that, but if are deploying static sites then deploying is actually free. Cool right.
With Nuxt there are many options for deployment and I am a fan of many of them to be honest but in this post I will talk about my favourite and the one I use to deploy my website on. Yes that platform is Netlify
Why Netlify?
For me Netlify wins on many scores but one of my favourite things about it, besides that it's free, is that it has a really easy to use interface. I like things to be simple and I like things to be nice. And did I mention it's free?
On top of that Netlify can do so much more than the simple things and you can easily add plugins for Cypress end to end testing or lighthouse tests on builds and I won't even go into serverless functions. There really is so much you can do with Netlify.
Getting Started
To get started with Netlify you need to create an account by signing up using your email or better still directly with your GitHub account, GitLab or BitBucket.
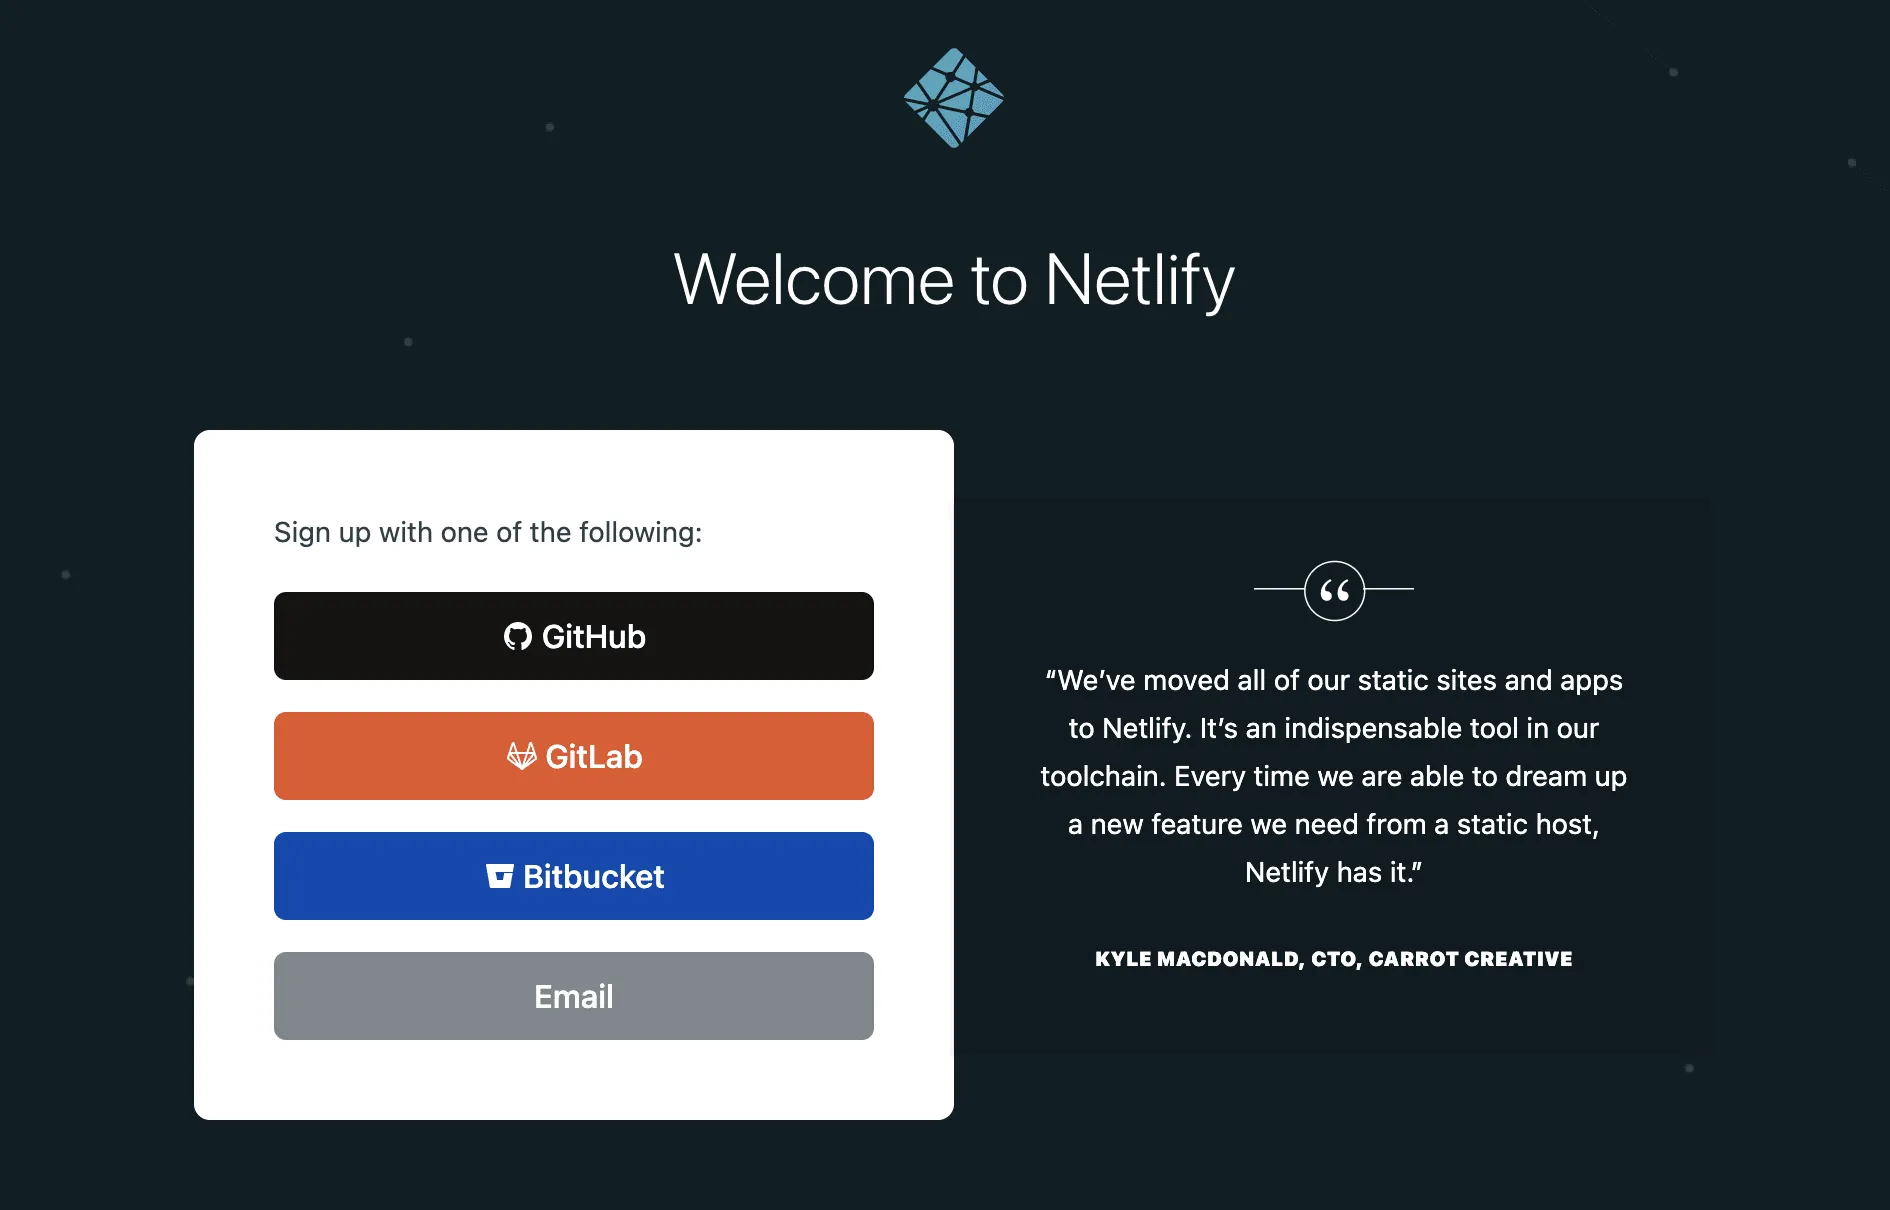
Of course if you don't already have one of these then I highly recommend setting up a GitHub account so you can publish your code. GitHub is great and it is also free.
Adding your site
Once your app is in a GitHub repo you can easily add it to Netlify by pressing the button 'New Site from Git' and selecting GitHub.
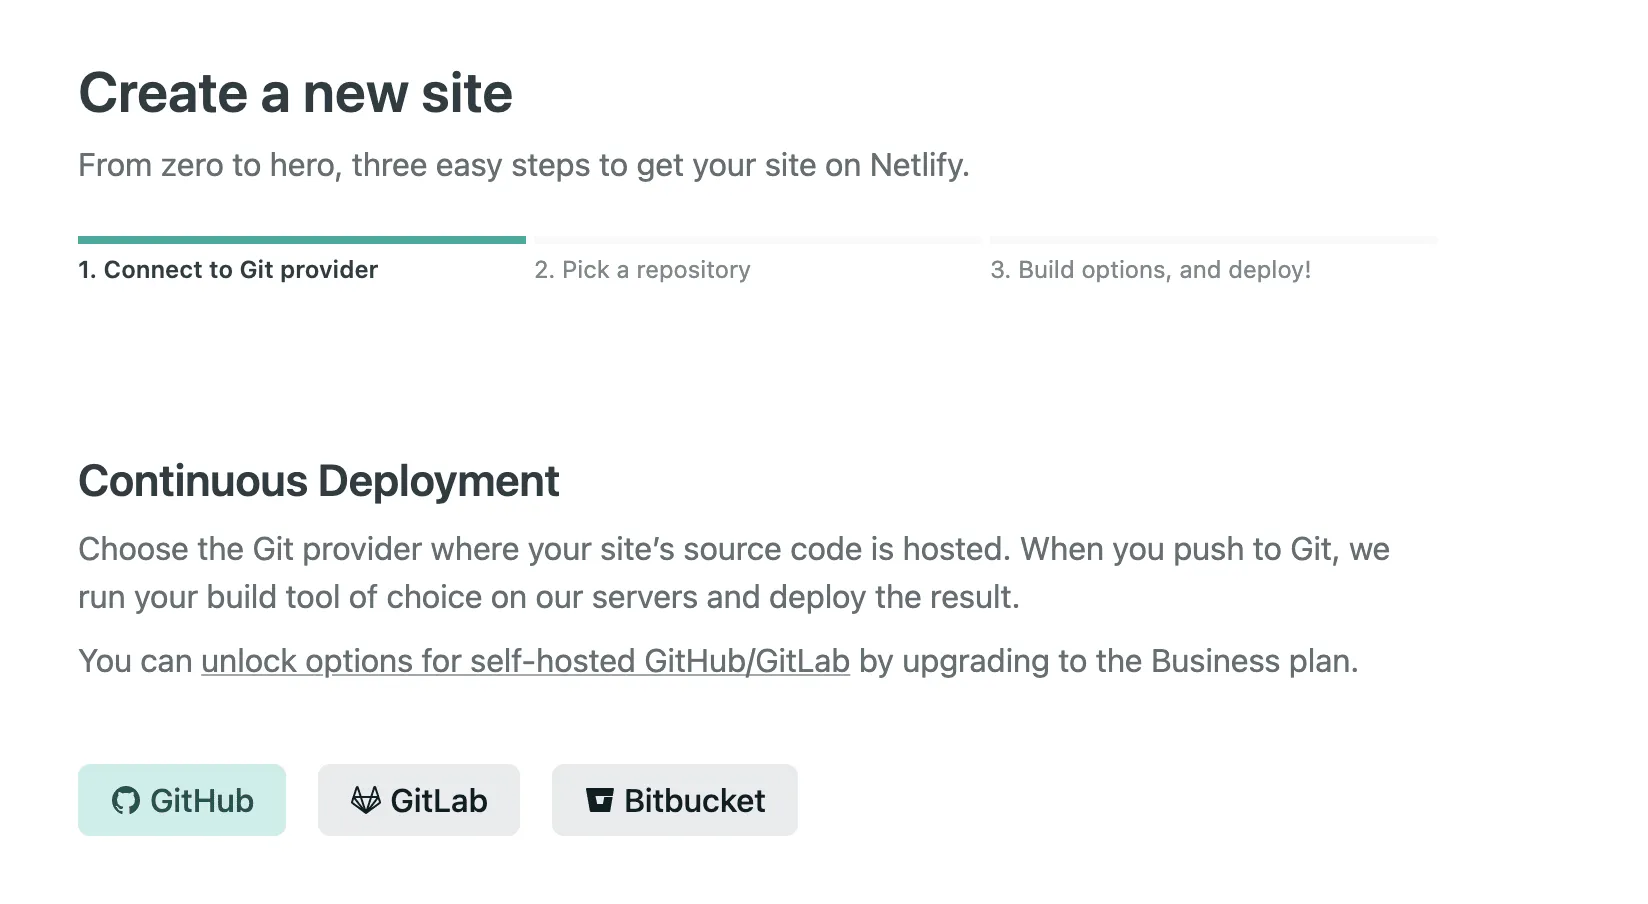
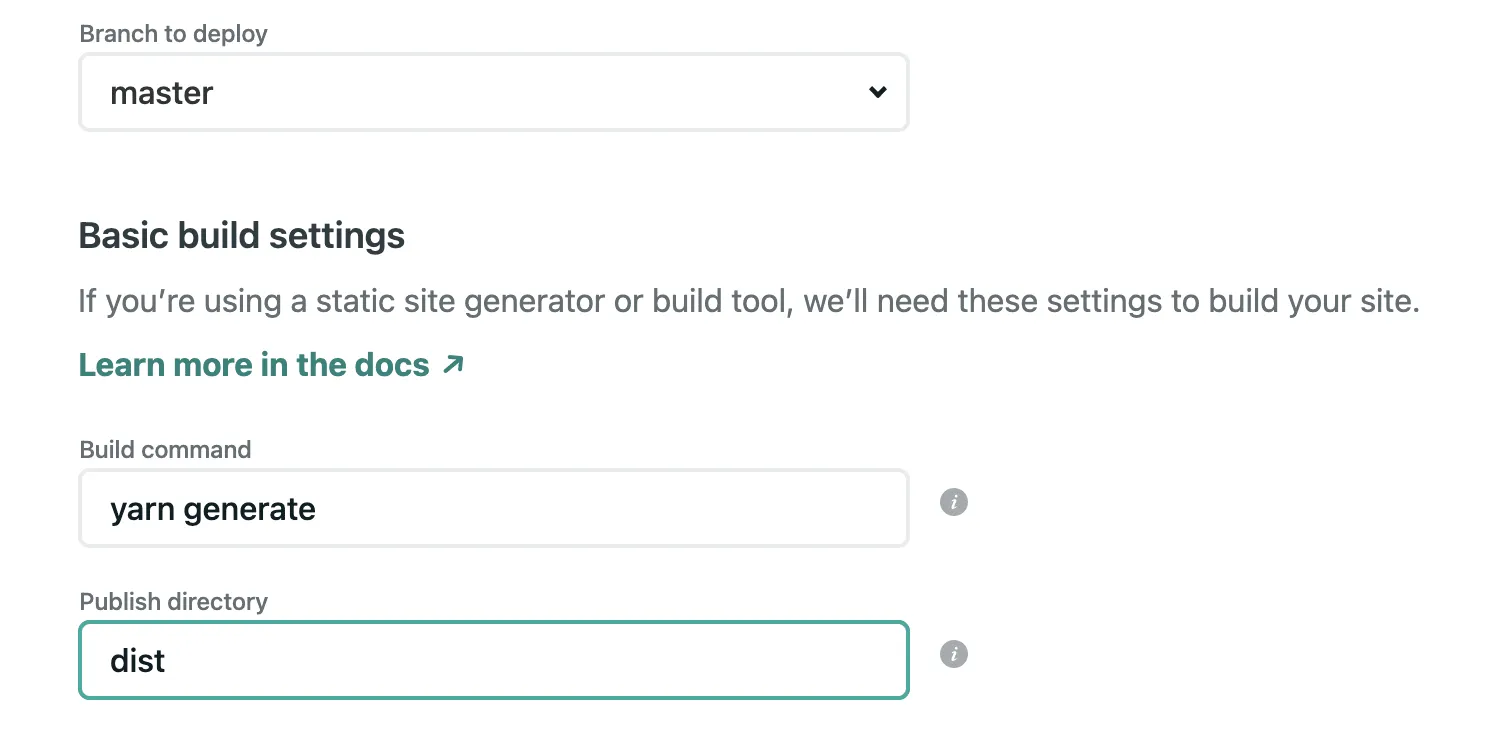
This will check you are authorized and then show you a list of your repos. From there you can choose the one you want to deploy. You will need to choose the branch. You may only want to deploy the feature or dev branch for example but generally you will want the main or master branch. Then you need to set the commands in order to build your static site. For a Nuxt static site you use the generate command and folder to be published is the dist folder.
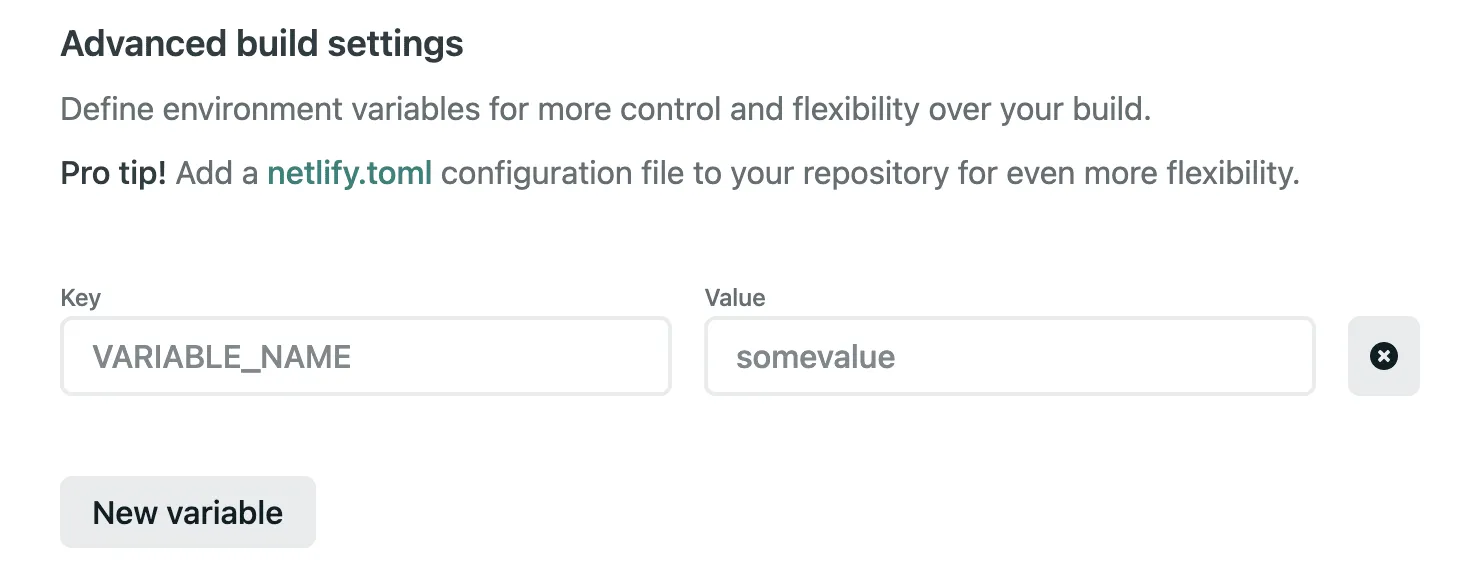
Variables
If you have environment variables that you need to use then you can click the advanced button and add them in here. If you forget then don't worry. You can always add them in later.
Start Deploying
Once you click on 'Deploy Site' Netlify will start the deployment. In a matter of minutes your app will be deployed using a random url that is auto generated for you. While waiting for the site to deploy you can click on the link under Step 1 and check out the deploy log to see what is going on. This is a great place to look at if for some reason your deploy fails.
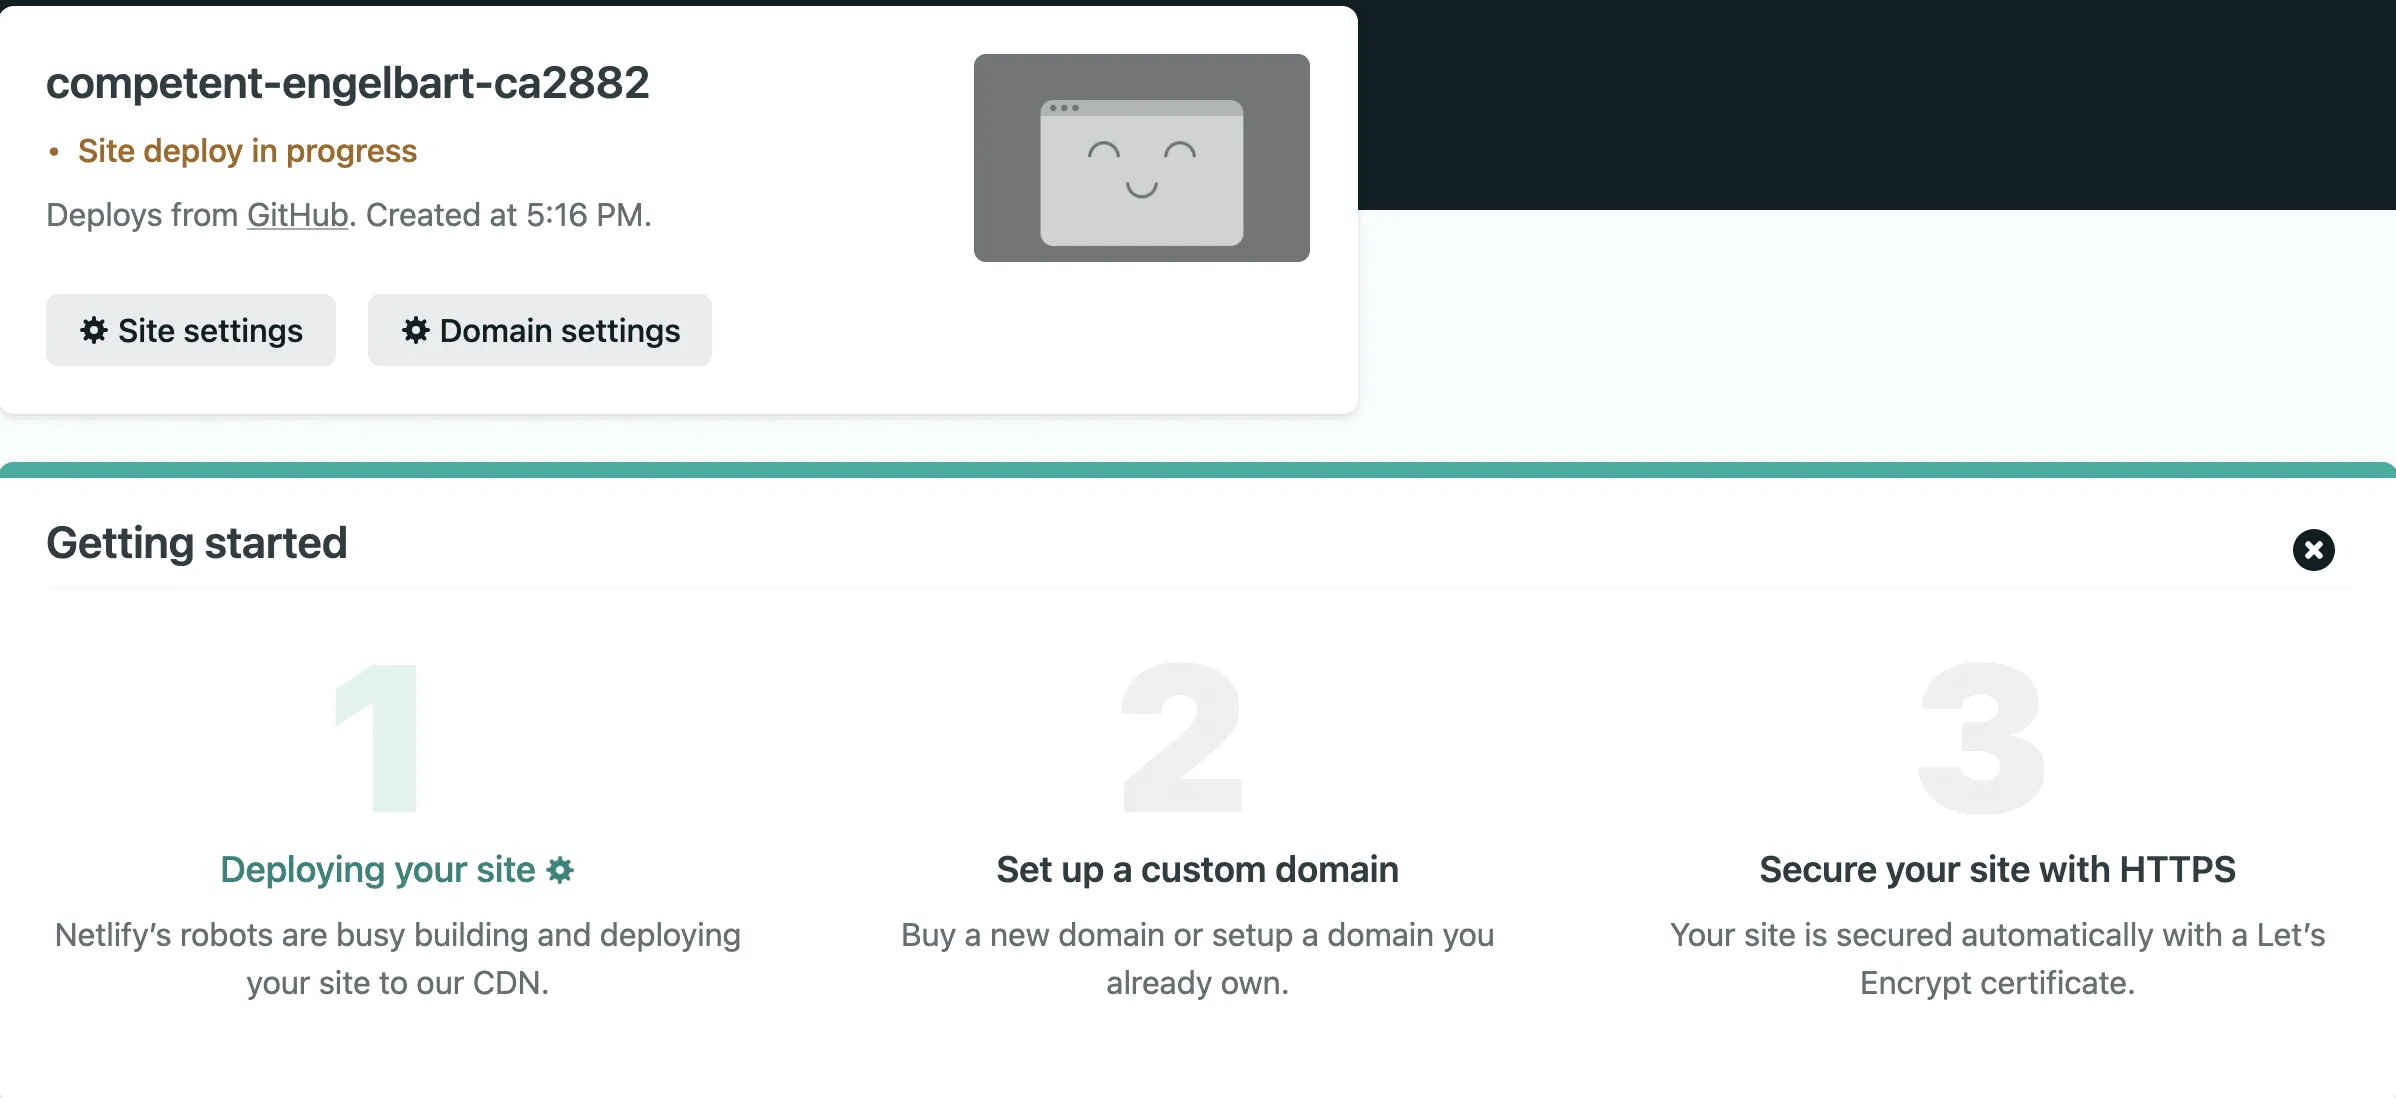
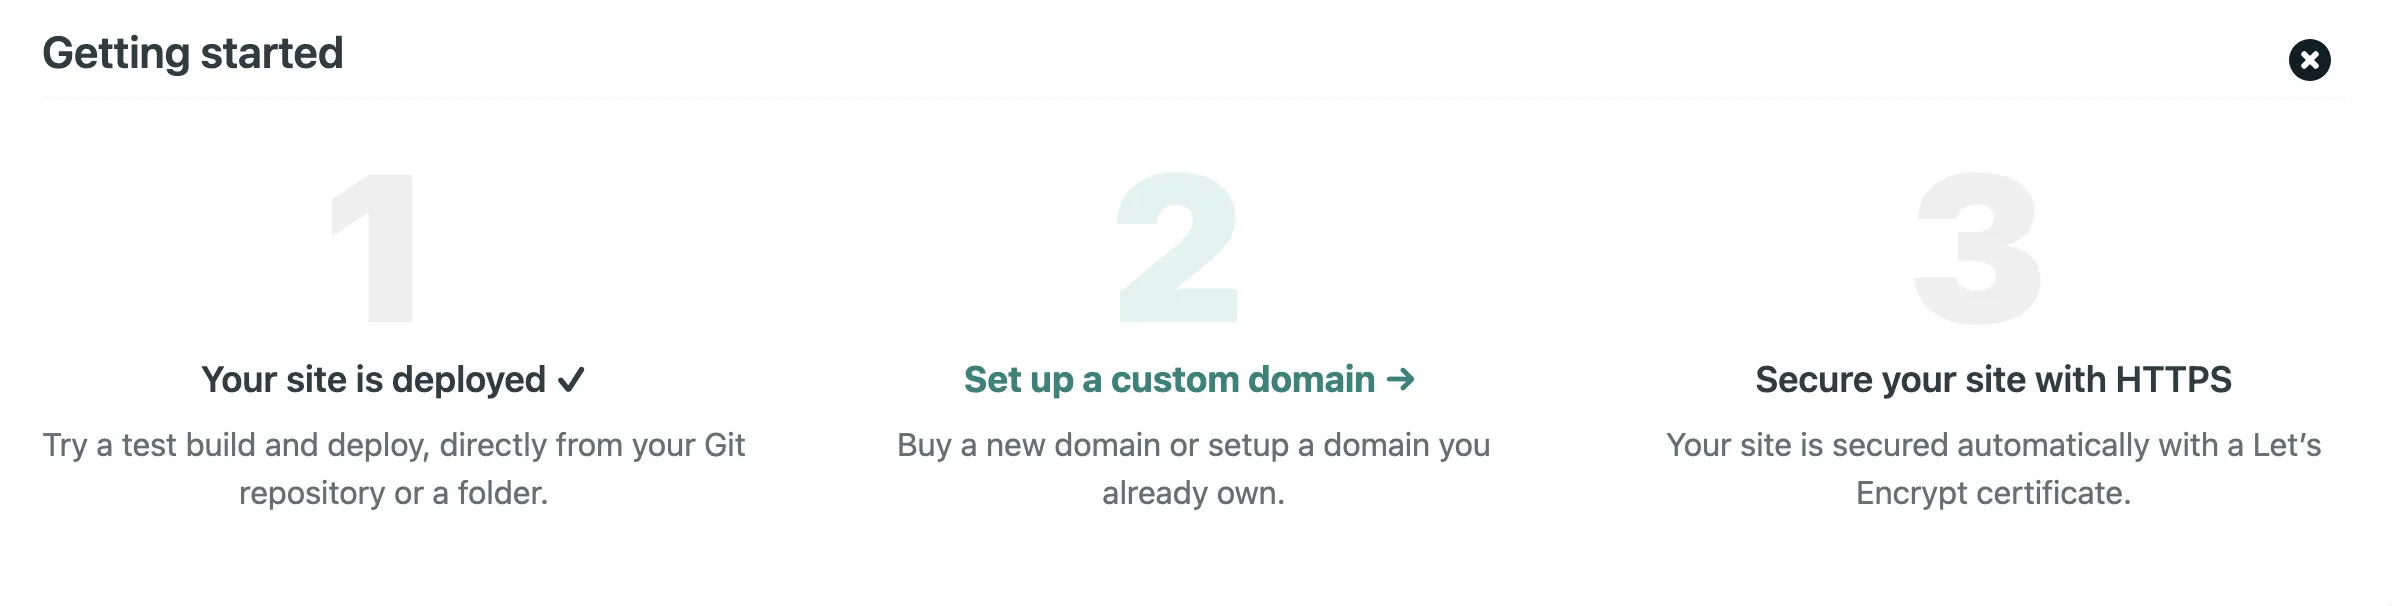
The steps are quite clear and after your site is deployed step 1 will be complete and step 2 is highlighted. You can click the link under the number 2 to Setup a custom domain. Here is where you can add your real domain that you want to use. You can then follow on to step 3 to setup HTTPS.
I don't have a domain
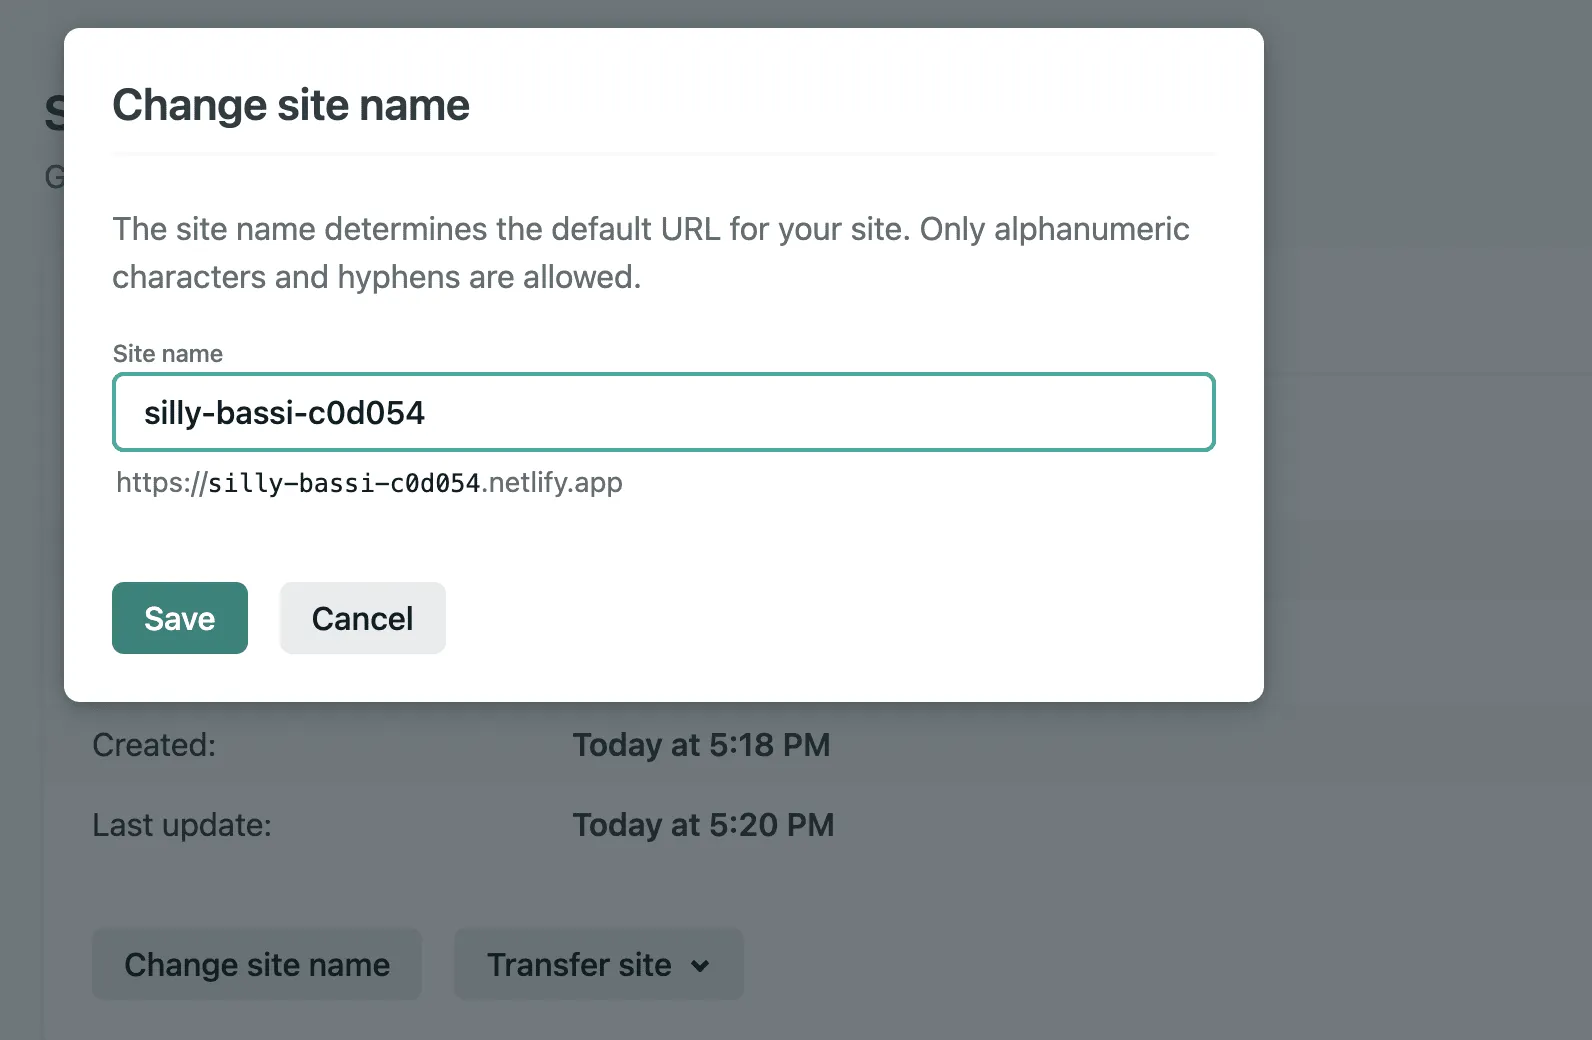
If you don't have a domain or perhaps for this project don't need one but don't want to have the silly url that Netlify auto generates for you then no worries. Click on the site settings button and then click on 'Change site name'. In the input box you can add anything you like and if it is available then it is yours. This domain is free and will have '.netlify.app' at the end but sometimes it is more than enough.
Deploying a dev branch
If you want to deploy a main/master branch and a dev branch then you can still do that. Click on 'Deploys' from the main menu then choose 'Deploy Settings' and then from the menu click on 'Continuous Deployment'. Before I go on let me tell you that continuos deployment is automatically set up for you at this stage and anytime you do a push to GitHub your site will be deployed.
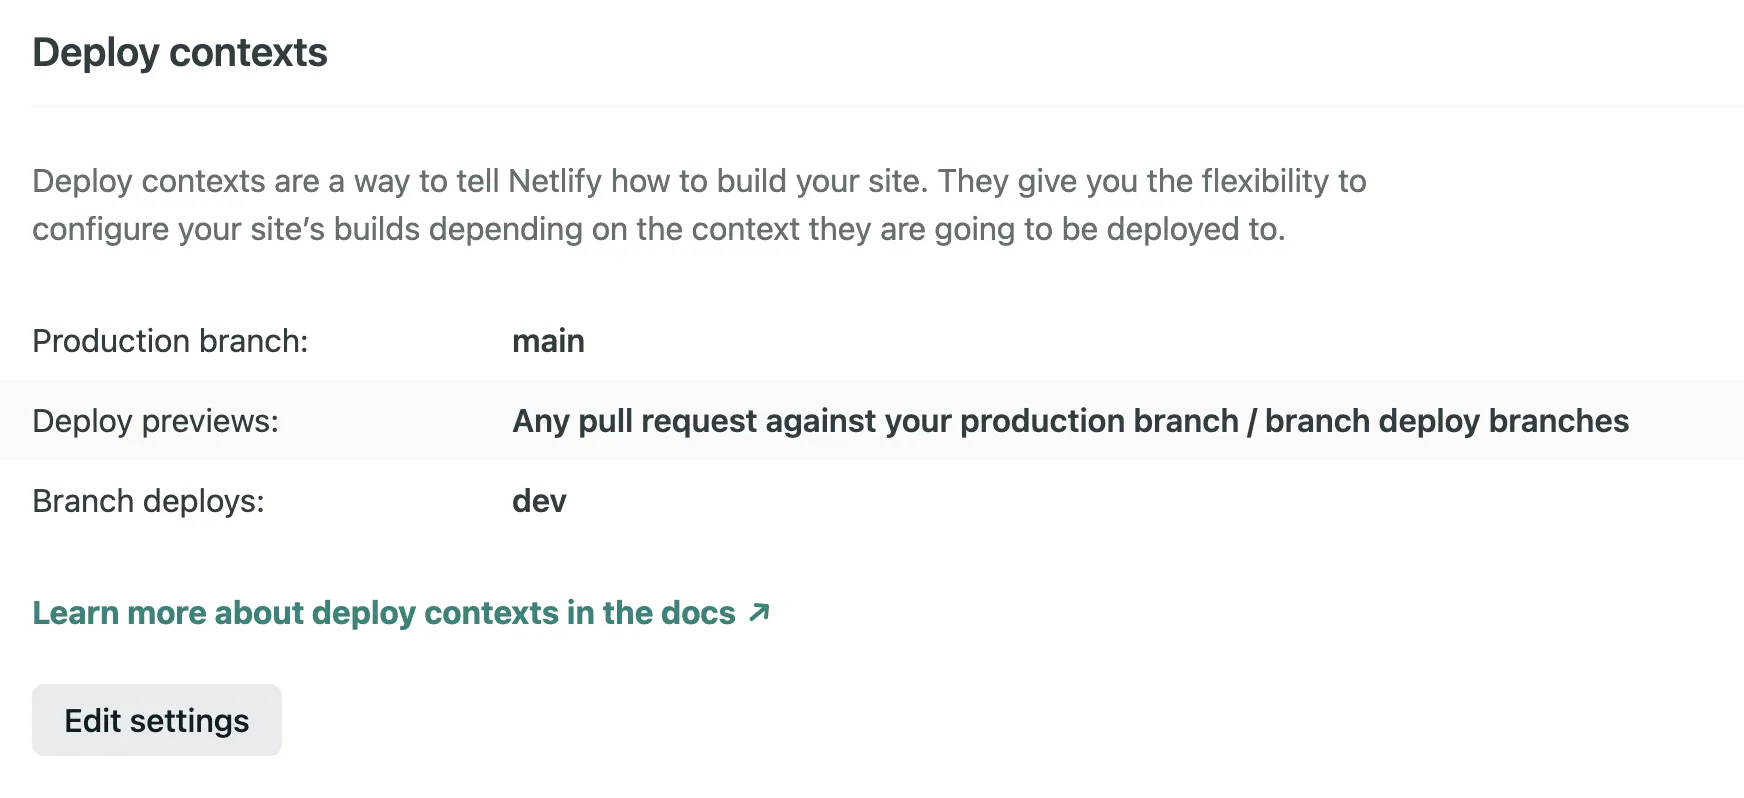
Now we want the same thing to happen for the dev branch too. In 'Deploy Contexts' click on 'Edit Settings'. Here you can select 'Let me add individual branches' and then choose the branch you want also to be deployed, for example 'dev'. Now anytime you push to the dev branch your app will be deployed meaning you can see it and share it with others before merging to master.
Previewing a Previous Deploy
At any time you can preview a previous deploy, retry a deploy and even lock publishing to a certain deploy. This is a great feature for if you break something and don't have time to fix it. Just go back to a previous deploy that was good and lock it to that one until you have time to fix and redeploy.

These are just some of the basics you can do with Netlify and there is so much more you can explore. But hopefully this post will show you how easy it is to deploy to Netlify. However if you are still not convinced there there is an even easier way by just dragging and dropping.
Drag and Drop Option
Once you have generated your dist folder in VSCode using the 'generate' Command. Click on sites in Netlify and scroll to the end where you will see a box that says 'Want to deploy a new site to Netlify without connecting to Git?'. Right click the dist folder and choose 'open in finder' and then drag it and drop it into this box.

Your app is now deployed. This is a simple and fast way of deploying a site but if you need to make any changes you will need to locally generate it again and drag and drop it again. But still it is a cool feature.
Watch the Video
If reading is not your thing then check out the video I created for the JamStack Explorers course which talks you through the whole process.
Tip
Remember to generate a static site to Netlify make sure you have the targetset to staticin the Nuxt config.
export default {
  target: 'static'
}