
Getting Started with Playwright Testing

Nowadays people really do want to write tests. They know they want to, they know the need to. We have gone past the making a point of how tests can save time. Developers know this yet they are not testing their apps. Why is this?
Mainly it is because developers do not have the time. They need time to learn the testing Framework and they need time to write the tests and let's face it most developers are busy and have to reach important deadlines and so testing gets left for some time in the future when they are not so busy. And unfortunately sometimes that time in the future just never comes. That means that developers are often faced with fixing bugs that could have been prevented if tests had been created from the early stages.
So what if we could make it easier for developers, soften the learning curve when it comes to writing tests so they can at least get started, and then help them build their tests along the way without just telling them to go read the docs. This is exactly what Playwright has done.
Playwright is an Open Source Testing Tool, maintained by Microsoft, and is completely free to use. It enables reliable end-to-end testing for modern web apps. It supports multi languages including JavaScript, TypeScript, Python, Java and .NET.
Tests are run across all modern rendering engines including Chromium, WebKit, and Firefox and you can test on Windows, Linux, and macOS, locally or on CI, headless or headed and you can even test a Native mobile emulation of Google Chrome for Android and Mobile Safari. The same rendering engine works on your Desktop and in the Cloud. Sounds pretty cool right!
But how easy is it to get started? Let me show you.
Installing Playwright
You can run this script in an already existing project or you can create a new project.
# Run from your project's root directory
npm init playwright@latest
# Or create a new project
npm init playwright@latest new-project
Installing Playwright with VS Code Extension
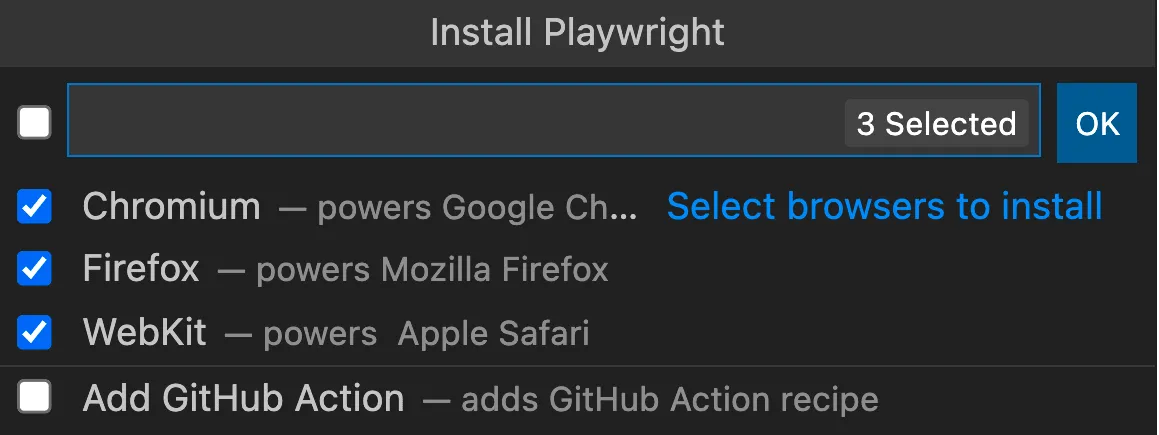
Alternatively my favorite way to get started is by using the VS Code extension to create a new project. In VSCode open the extensions and search for Playwright. Make sure you choose the one that is verified by Microsoft.

Once the extension is installed you can then install Playwright in your project using the command bar in VS Code. Use CMD+Shift+P and then type >playwright.

You can then choose if you want the tests to run on Chromium, WebKit or Firefox and you can also decide if you want to add a GitHub action. You can always add or remove these later on through the Playwright config file.
What you get after Installing
Once installed you will get:
package.jsonfile, unless you are already inside a project that contains this file and if so Playwright will be added to yourpackage.json.playwright.config.tsfile which is where you can configure Playwright, add or remove the browsers you want to test on and so much more.- Tests folder with an example test file.
The example test file is a very complete example of how to write tests for a TODO app and I highly encourage you to check it out. But I want to show you how to get started writing your own tests so lets continue with that.
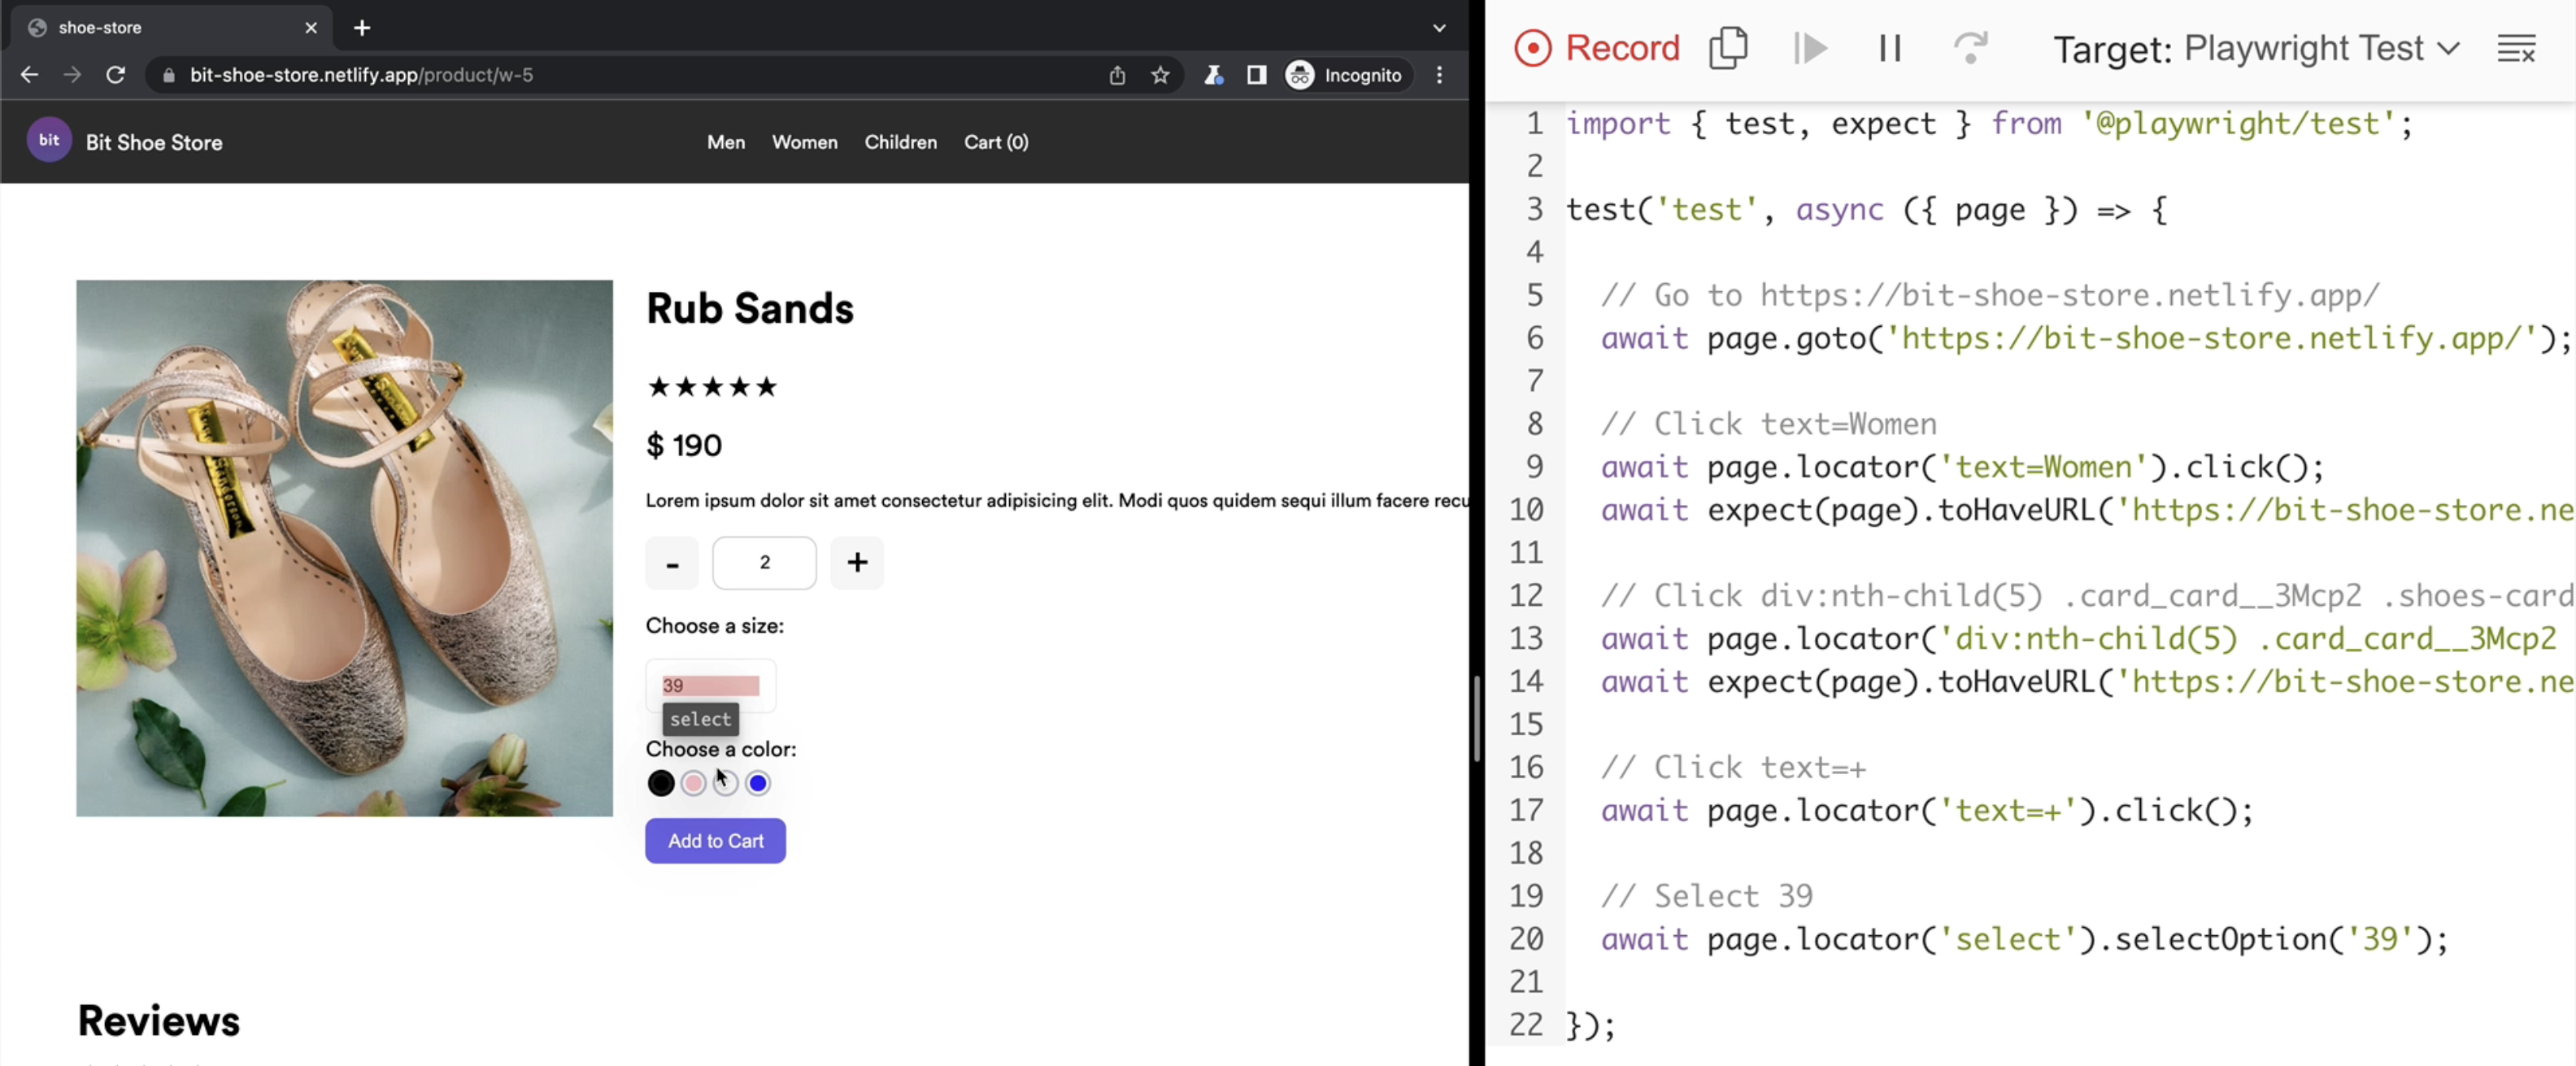
Generating Tests with Codegen
We will use codegen which generates tests by recording your actions. You can literally open any website and start browsing your application and interacting with it and as you do your tests will literally be written before you very own eyes. To open Codegen run the following command:
npm playwright codegen
This will open two windows for you. The first one is the browser window that you will use to navigate to your site that you want to test and the second window is the where the test code will be saved. Check out the video to see it in action.
Copy the Tests to your Editor
Once you have finished recording your actions you can copy the test code to a test file in VS Code and there you go, you have just written your first test. If you prefer your tests in another language then choose from the dropdown menu and the the code will change to that language.
You can then click the copy button to copy the code to your clipboard and paste it into a newly created test file in your tests folder. And there you have it. You have just written your first test and all you had to do was click around your site and copy and paste the code. Now how cool is that.
Running your Tests
If you now want to run your test and are using the VS Code extension then you can press the green triangle next to the line where your tests start.
Or you can run the tests by running the following command in your terminal:
npx playwright test
This will run the test and give you the output in the cli. If you want to run your tests in a headed manner, meaning it will open your browser so you can visually see it run the tests, then you can use the following command:
npx playwright test --headed
Be wared though as the tests are super fast meaning it will open, run the tests and close in a matter of seconds. In a future post I will show you how to pause the tests, debug the tests or open a trace file or feel free to check out the Playwright docs for more information.
Conclusion
Playwright is super fun and easy to get started with and Codegen is an amazing tool that is going to really help make developers lives easier. Now there really is no excuses for not testing your applications. I highly encourage you to check it out and take it for a spin.
Of course automated code might not always be perfect and may need tweaking but it sure is a great way of getting started and getting your tests written in record time. As always check out the Playwright docs to learn more and further enhance your tests.